A roof drip edge is a thin metal flashing installed along the edges of your roof to direct water away from the fascia board and into the gutter system. Without one, rainwater and snowmelt can seep behind your shingles, damage the wood underneath, and cause rot that spreads fast in Winnipeg’s freeze-thaw cycles.
This blog covers why every Canadian homeowner should have a roof drip edge, the different types available, how professionals install them, what happens when you skip this small but important component, and answers to common questions property owners ask before starting a roofing project.
Whether you are building new or replacing an aging roof, a properly installed roof drip edge saves you from expensive repairs down the road. Homes in Manitoba face heavy snow loads, ice dams, and wind-driven rain, all of which make this metal flashing a non-negotiable part of any quality roofing system.
Why Does Your Roof Need a Drip Edge?
A roof drip edge does more than just look tidy along your roofline. It plays a direct role in protecting the structural components of your home from water infiltration. When rain hits your shingles, it flows downward toward the edge of the roof.
Without a roof drip edge, that water clings to the underside of the shingles through surface tension and travels along the decking, fascia, and soffit. Over time, this moisture causes wood rot, mould growth, and even foundation damage if the water pools near your home’s base.
In Winnipeg, where temperatures swing between extreme cold and warm seasons, the risk of ice damming adds another layer of concern. Ice dams form when heat escaping from the attic melts snow on the roof, and the meltwater refreezes at the colder edge.
A roof drip edge helps channel that water before it refreezes in problem areas. It also prevents wind-driven rain from blowing underneath the shingles during storms, which is common across the prairies.
Building codes in many Canadian provinces now require a roof drip edge on new construction and major roof replacements. Even if your local code does not mandate it, experienced roofing professionals will recommend it because the cost is minimal compared to the protection it provides.
Zega Roofing installs drip edges on every residential roof installation project in Winnipeg because skipping it simply creates unnecessary risk for the homeowner.
Types of Roof Drip Edge Profiles
Not all drip edges look the same. Different profiles serve different purposes depending on the slope of your roof, the style of your gutters, and the climate you live in. Here are the most common types used in Canadian roofing:
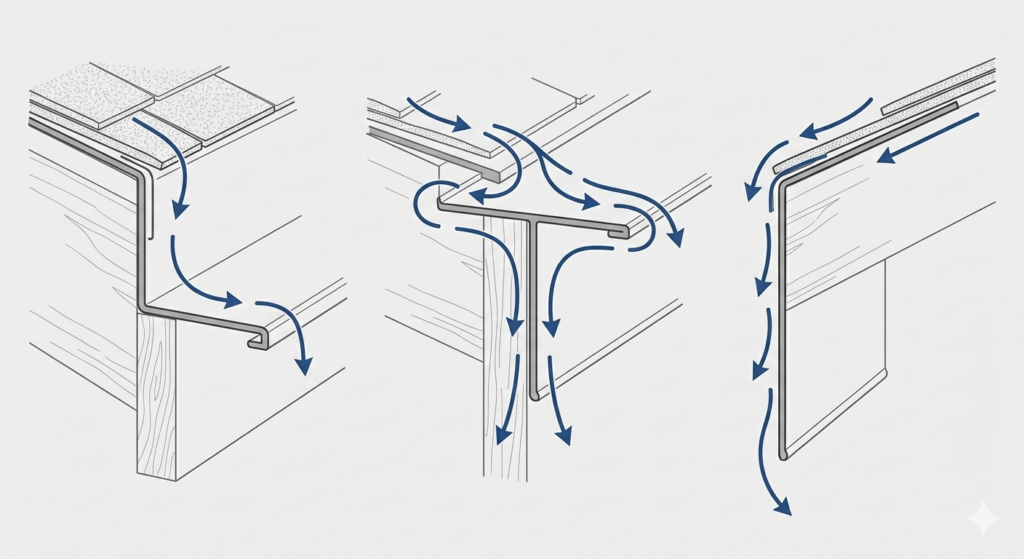
Type C (L-Shaped)
This is the simplest profile and looks like the letter “L” when viewed from the side. It bends at a 90-degree angle, with one flange sitting on the roof deck and the other hanging over the edge. Type C works well for homes with a standard gutter setup and moderate rainfall. It is the most affordable option but offers less protection in heavy rain or snow.
Type D (T-Shaped or D-Metal)
Type D is the most popular choice for Canadian homes, and for good reason. It has a lower flange that kicks outward, creating a gap between the fascia and the drip edge. This design pushes water further away from the fascia board and directly into the gutter trough. For properties in Winnipeg, where snow and ice buildup are common, Type D provides the best performance.
Type F (Gutter Apron)
Type F has a longer upper flange that extends further under the shingles. Roofers use this type when the existing roof has a wide gap between the shingle edge and the gutter. It provides extra coverage and helps bridge that gap so water does not miss the gutter entirely.
| Drip Edge Type | Best Use | Key Feature |
| Type C (L-Shaped) | Standard roofs with basic gutter systems | Simple bend, most affordable |
| Type D (T-Shaped) | Cold climates with heavy snow and ice | Kickout flange pushes water into gutter |
| Type F (Gutter Apron) | Roofs with wide gaps between shingles and gutter | Extended upper flange for more coverage |
For most homes in Manitoba, Type D is the recommended choice. If you are unsure which profile fits your roof, Zega Roofing offers free inspections and can advise you on the right option during a roofing installation in Winnipeg consultation.
How Is a Roof Drip Edge Installed?
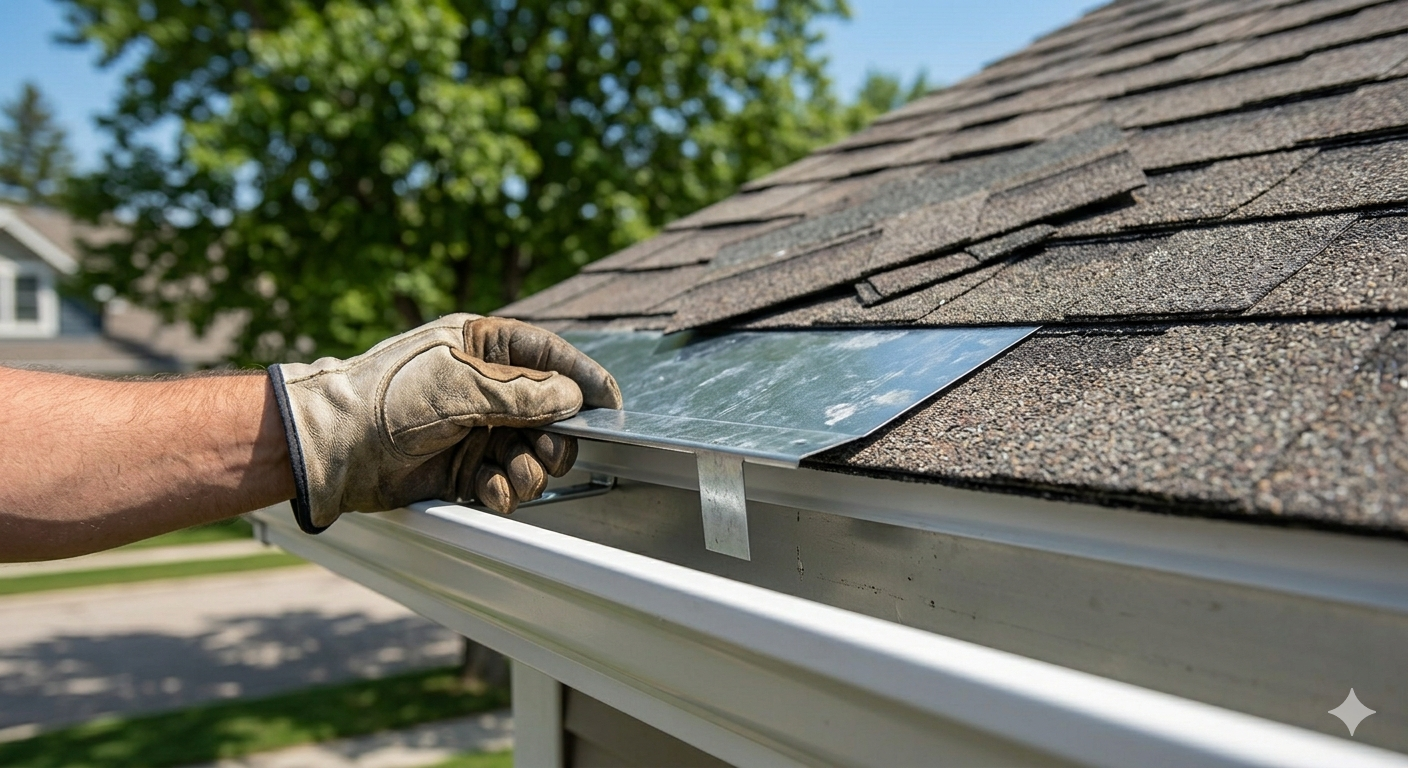
Professional installation of a roof drip edge follows a specific sequence that matters more than most homeowners realize. Getting the order wrong can actually trap water instead of directing it away. Here is how experienced roofers handle the process:
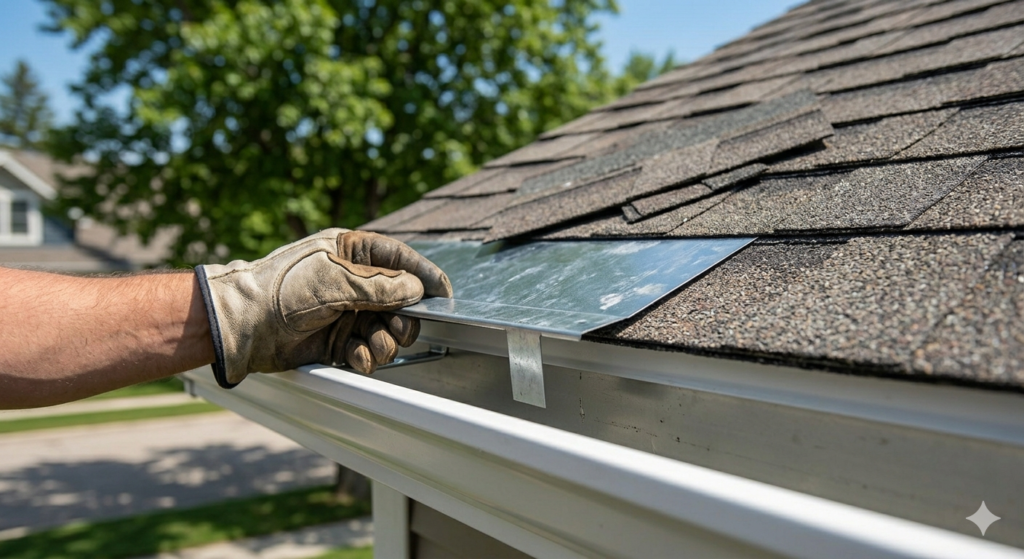
First, the roofing crew secures the drip edge along the eave (the bottom horizontal edge of the roof) directly onto the roof deck before the underlayment is applied. This allows the underlayment to overlap the top flange of the drip edge, so any water that gets beneath the shingles flows over the metal and off the roof.
Next, the underlayment or ice and water shield is rolled out across the roof deck, covering the top of the eave drip edge. At the rake (the sloped side edges of the roof), the installation order reverses. The drip edge goes on top of the underlayment along the rakes. This layering ensures water always flows downward and outward rather than getting trapped between materials.
The drip edge pieces are overlapped by about two inches where they meet, and each piece is fastened with roofing nails spaced roughly 12 inches apart. The nails go through the top flange and into the roof deck, and shingles later cover the nail heads for a clean, weathertight finish.
One common mistake that less experienced contractors make is installing the drip edge on top of the underlayment at the eaves. This error allows water to travel behind the metal and soak into the fascia, which defeats the entire purpose of having a roof drip edge in the first place.
Materials Used for Roof Drip Edge Flashing
The material your roofer uses for the roof drip edge affects how long it lasts, how well it handles temperature changes, and whether it resists corrosion from rain, snow, and ice.
| Material | Durability | Best For | Consideration |
| Galvanized Steel | 20+ years | Most residential roofs | Affordable and widely available |
| Aluminum | 20+ years | Coastal or high-moisture areas | Lightweight, does not rust |
| Copper | 50+ years | Premium or heritage homes | Develops a patina over time, higher cost |
| PVC/Vinyl | 10-15 years | Budget projects | Less durable in extreme cold |
Galvanized steel is the standard choice for Winnipeg homes because it handles the temperature extremes well and resists corrosion. Aluminum is a solid alternative for homeowners who want a lighter material that will not rust. Copper is occasionally used on high-end or heritage properties, but the price point puts it outside the typical residential budget.
For pricing on materials and installation, contact Zega Roofing directly at +1 204-997-2697 for a free estimate tailored to your property.
What Happens When You Skip the Drip Edge?
Some homeowners consider leaving out the roof drip edge to save a few dollars, but this decision almost always leads to costlier problems. Without a drip edge, water follows the path of least resistance, which usually means it creeps behind the shingles and soaks into the wooden roof deck and fascia boards.
In Winnipeg’s climate, that moisture freezes and thaws repeatedly throughout winter and spring. Each cycle expands the wood fibres, accelerating rot and creating entry points for pests. Squirrels, birds, and insects are quick to exploit softened wood along the roofline.
Fascia damage is one of the most visible consequences. You will notice paint peeling, wood warping, and dark stains along the edges of the roof. If left unaddressed, the damage spreads to the soffit and even the wall sheathing behind the fascia.
Ice dams become worse without a roof drip edge because meltwater has no defined path and backs up under the shingles. This causes interior leaks that show up as water stains on ceilings and walls, which are expensive to repair and can lead to mould behind drywall.
If your roof is missing a drip edge and you are noticing any of these signs, a professional inspection can help you understand the extent of the damage. Zega Roofing provides free roof inspections across Winnipeg and the surrounding communities listed on our areas we served page.
Roof Drip Edge vs. Roof Apron: Key Differences
Homeowners sometimes confuse a roof drip edge with a roof apron, and while they look similar, they serve different functions. A roof drip edge is installed along the eaves and rakes to direct water off the roof and into the gutter.
A roof apron, on the other hand, is a type of flashing installed where the roof meets a vertical wall, such as where a lower roof connects to the side of a second storey.
The apron flashing prevents water from entering the joint between the roof surface and the wall. It tucks under the siding and over the shingles to create a watertight seal. A drip edge does not handle wall-to-roof transitions at all. Its only job is to manage water at the outer perimeter of the roof.
Both components are essential parts of a complete roofing system, but they are not interchangeable. A properly installed roof includes both a roof drip edge at the edges and apron flashing at any wall intersections.
Things To Know About Roof Drip Edge
Before you start a roofing project or request a quote, keep these practical points in mind:
A roof drip edge is required by most building codes in Canada for new construction and full roof replacements. Even partial re-roofing projects benefit from adding or replacing the drip edge.
The colour of your drip edge should match your shingles or fascia for a seamless look. Most suppliers offer drip edge flashing in white, brown, black, and charcoal.
Installation typically adds very little time to a roofing project. An experienced crew can install the drip edge on an average-sized home in under an hour.
Drip edges should be inspected every time your roof is checked for general wear. Look for bending, separation from the fascia, or areas where the metal has pulled away from the deck.
If your gutters are being replaced at the same time as your roof, make sure the roofer coordinates the drip edge installation with the gutter installer. The drip edge must sit inside the gutter trough for proper water flow.
Never caulk or seal the bottom of the roof drip edge to the fascia. The small gap between the drip edge and fascia is intentional and allows water to drip freely into the gutter rather than getting trapped behind the metal.
How Zega Roofing Handles Drip Edge Installation in Winnipeg
Zega Roofing has over 25 years of experience serving homeowners and commercial property owners across Winnipeg. Every roof drip edge installation follows manufacturer guidelines and local building codes to ensure long-lasting protection. Our crew uses galvanized steel or aluminum drip edge flashing depending on the specific needs of your roof and budget.
We include roof drip edge installation as a standard part of every full roof replacement and new shingle roof replacement project. We also retrofit drip edges on older roofs that were built without them.
Our team inspects the fascia and roof deck before installation to identify any existing damage that needs repair first, because installing a drip edge over rotted wood does not solve the underlying problem.
Frequently Asked Questions About Roof Drip Edge
Is a drip edge necessary on a roof?
Yes, a roof drip edge is necessary for protecting the fascia, soffit, and roof deck from water damage. Most Canadian building codes require it on new builds and major replacements. Even on older homes where codes do not mandate it, adding one is a low-cost way to prevent expensive repairs caused by moisture infiltration and ice damming.
What is roofing drip edge called?
A roofing drip edge is also known as drip edge flashing or simply “drip metal.” Roofers may also refer to it by its profile type, such as D-metal or T-style flashing. Regardless of the name, it describes the metal strip installed along roof edges to guide water into the gutter system.
What is the difference between a roof apron and a drip edge?
A roof apron is flashing used where a roof meets a vertical wall, while a roof drip edge is installed along the outer edges (eaves and rakes). They protect different areas of the roofing system. Both are important, but they are not substitutes for each other. A complete roof needs both components installed correctly.
How does a drip edge go on a roof?
A roof drip edge is nailed to the roof deck along the eaves before the underlayment, and along the rakes on top of the underlayment. Pieces overlap by about two inches, and nails are spaced approximately 12 inches apart. Shingles then cover the top flange for a clean finish.
What is the alternative to drip edge?
There is no true equal alternative to a roof drip edge, but some homeowners use extended shingle overhangs or additional gutter apron flashing as partial substitutes. These methods do not provide the same level of protection. For Canadian climates with heavy snow and ice, a proper drip edge remains the most reliable option for long-term performance.