Roofing brackets are essential structural supports that secure scaffolding, staging boards, and roof components during installation, repair, and maintenance work. They hold workers safely on steep or slippery surfaces and keep roofing materials properly aligned and anchored throughout the project. Choosing the wrong type or skipping them entirely creates serious safety hazards and can result in structural failures that are expensive to fix.
How Do Roofing Brackets Work?
Roofing brackets are hardware components, usually made from steel or heavy-duty galvanized metal, that attach directly to the roof decking or rafters. Their primary function is to create a stable, temporary or permanent platform that allows workers to move safely across sloped surfaces without sliding. On pitched roofs, they hook over nails driven into the roof sheathing and support a horizontal plank called a staging board, creating a ledge where a roofer can stand, kneel, or set materials down without risk of falling off the edge.
Beyond scaffolding use, they are also used structurally to anchor ridge caps, secure overhangs, attach fascia boards, and stabilize valley flashing during installation. In cold climates like Winnipeg, they support snow guards and ice barriers that prevent heavy snow loads from sliding off roofs unexpectedly. The angle and weight capacity of these components matter greatly depending on roof pitch. A low-slope roof may need a simple flat bracket, while a steep 10:12 or 12:12 pitch requires a specifically angled model that keeps the staging plank level regardless of how steep the surface is. Mismatched pitch ratings are among the most common and dangerous mistakes made during roofing projects.
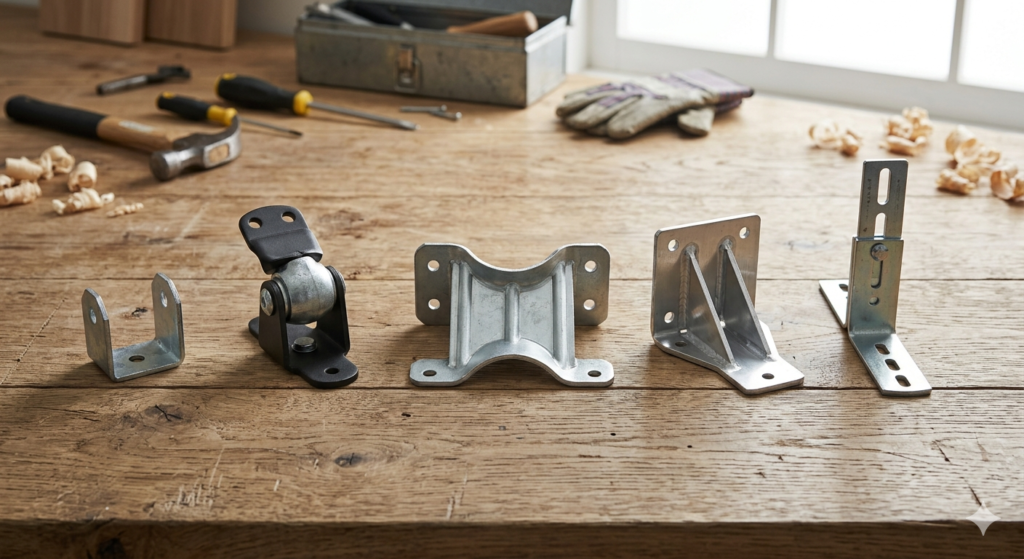
Types of Roofing Brackets You Should Know
Not all of these supports serve the same function. Knowing the differences helps you select the right option for your specific project and avoid costly or dangerous errors on site.
Roof Jacks (Staging Brackets)
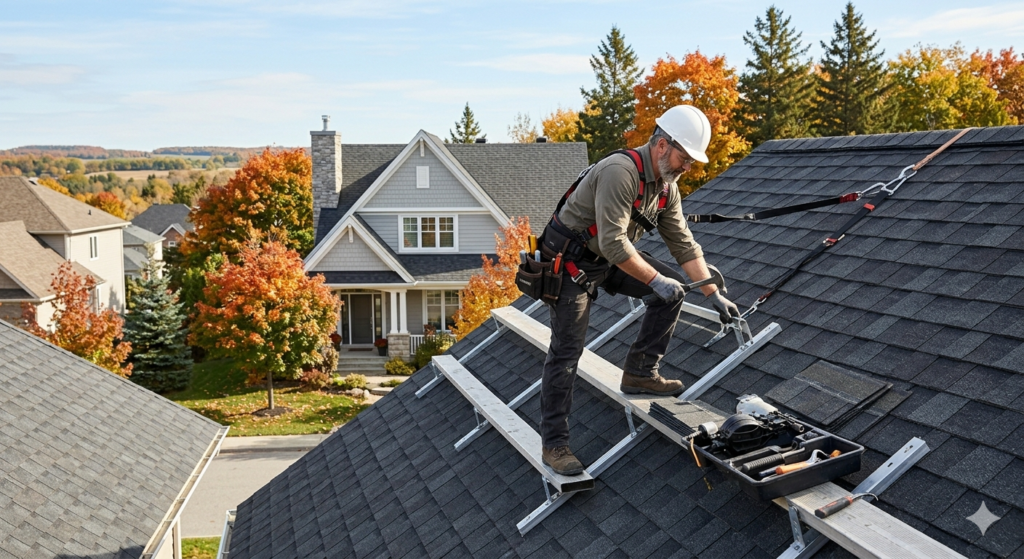
These are the most widely used roofing brackets on residential projects. They are adjustable, nail-on supports that hold a 2×10 or 2×12 plank horizontally against the slope. Most roof jacks accommodate different pitch angles, making them versatile across property types. They are typically used in pairs spaced four to six feet apart, with the staging board running across them to create a continuous work platform.
Ridge Brackets
Ridge brackets sit at the very peak of the roof. They stabilize the ridge cap installation and sometimes serve as attachment points for safety lines or fall arrest systems. Those made from heavy-gauge steel are preferred for permanent installations where structural support is required long term.
Valley Brackets
Valley brackets are positioned in the V-shaped channels where two roof planes meet. They keep flashing and underlayment materials properly aligned during installation, preventing gaps or overlaps that allow water intrusion. In Winnipeg’s freeze-thaw climate, poorly secured valley materials are a leading cause of roof leaks and interior water damage.
Snow Guard Brackets
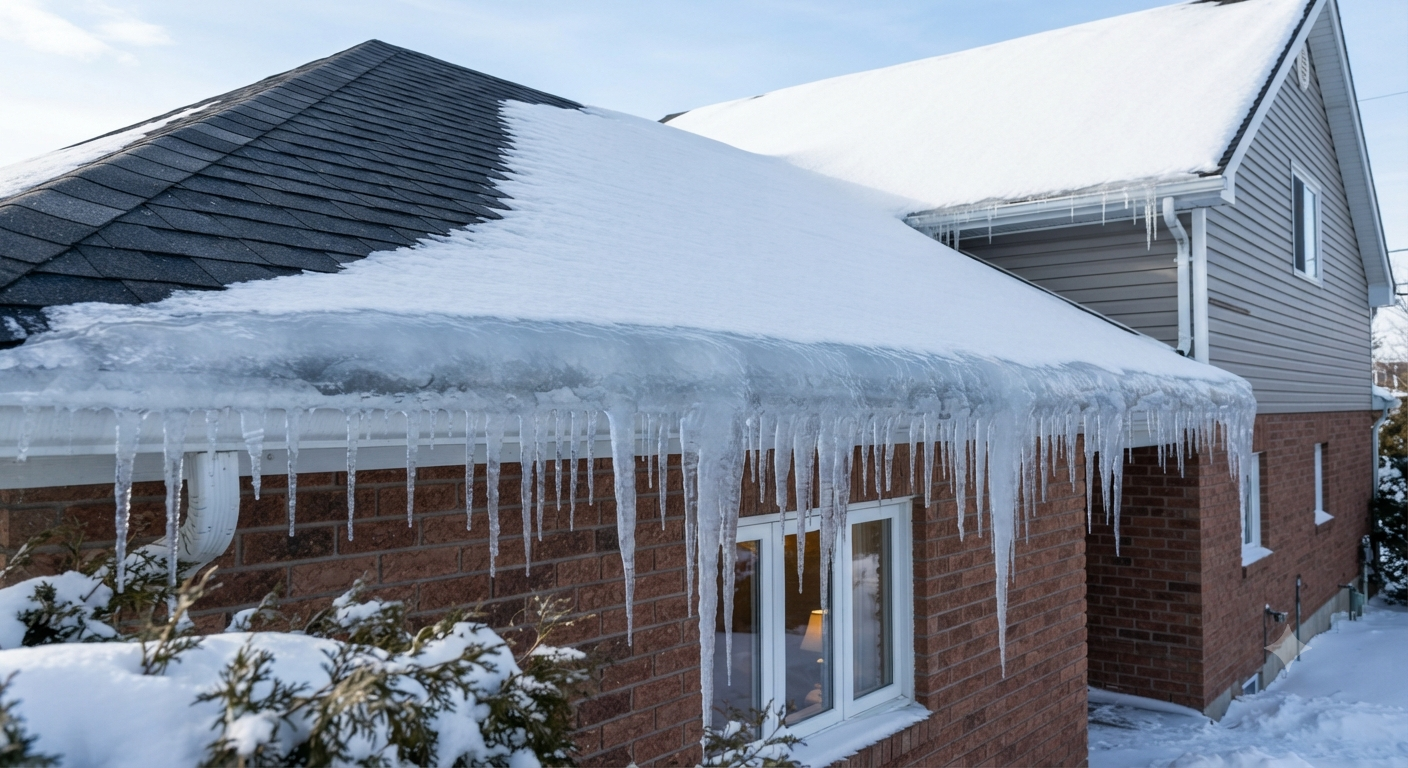
These are a specialized type designed to hold snow retention bars or pads in place. They are bolted or clamped to the roofing surface and prevent large sheets of ice and snow from releasing suddenly. They are especially important for metal and low-pitched roofs in Manitoba, where snow accumulation is heavy and ice damming is a persistent concern every winter.
Truss Brackets and Rafter Ties
These structural components connect rafters to wall plates or join truss pieces together inside the roof assembly. While not visible from the exterior, they are critical to the structural integrity of the entire system. Canadian building codes require specific types and spacings for these connectors, particularly in wind-prone or high-snowfall regions like Manitoba.
When Are Roofing Brackets Required?
These supports are not optional on most projects. Canadian occupational health and safety regulations require appropriate fall protection and staging systems whenever workers operate on a roof with a slope exceeding a certain pitch or at a height above three meters. Staging systems fall under this requirement on virtually any sloped residential or commercial roof.
Beyond safety regulations, they are required in several situations. During full roof replacements, workers need stable footing on bare decking after old shingles are stripped. Repair work on steep sections is unsafe without support. Metal roof installations almost always require proper staging brackets because metal surfaces are slippery when wet or cold. Ridge cap installation requires a bracket to hold components steady while fasteners are driven. Any project involving snow guards or ice barriers requires an appropriate system to keep those components anchored. If unsure whether your project requires specific hardware, consult a licensed contractor before starting.
Choosing the Right Roofing Brackets for Your Project
Selecting them correctly depends on several factors: roof pitch, material type, load requirements, and whether the application is temporary or permanent. The following table clarifies your options.
| Factor | Low-Slope Roof (under 4:12) | Steep-Slope Roof (6:12 and above) |
| Bracket Type Needed | Flat or low-angle roof jacks | Adjustable pitch staging brackets |
| Staging Board Requirement | Optional for short spans | Required for safe footing |
| Snow Guard Brackets | Rarely needed | Strongly recommended in Manitoba |
| Structural Connectors | Standard rafter ties | Heavy-duty hurricane ties or truss plates |
| Fall Protection Priority | Moderate | High |
When selecting roofing brackets, consider your roof surface material. Asphalt shingle roofs allow nail-on versions without permanent damage because nail holes are sealed by the overlapping shingle course during removal. Metal roofs require clamp-style supports that do not penetrate the surface. Tile and slate roofs need specialized brackets designed not to crack fragile materials during installation.
Load capacity is another critical consideration. Any bracket used for staging must be rated for the combined weight of the worker, tools, and materials on the board at the same time. Never use light-load brackets to support heavy shingle bundles or multiple workers at once.
How Are Roofing Brackets Installed?
Installing them properly requires preparation, the right tools, and knowledge of the roof structure beneath the surface. Placing them without knowing where rafters or trusses are located can result in them pulling out under load, which creates a dangerous condition on any elevated work surface.
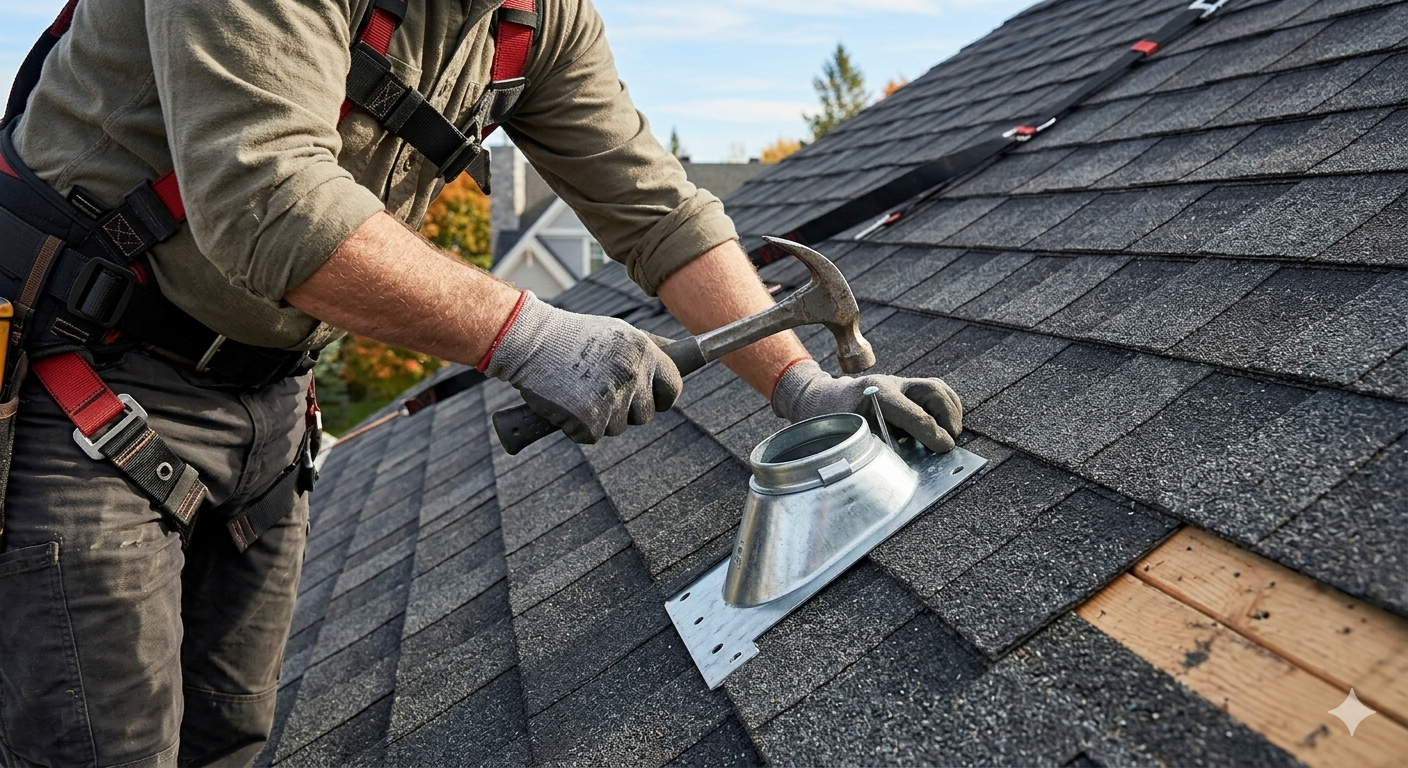
For nail-on roof jacks, the process begins by locating the rafters or trusses beneath the sheathing. They must be nailed into solid structural members, not just into the sheathing alone. Two or three 16-penny nails are driven through the nail slots into the rafter at an upward angle so the bracket is locked against downward force. The staging board is then slid through the opening and secured so it cannot shift sideways during use.
Once work in a section is complete, the staging boards are removed and the supports are knocked loose by striking them upward with a hammer. The nail holes left behind are covered by the overlapping shingle course above, which is why proper sequencing of installation matters throughout the project. Brackets removed too early or left in the wrong location result in exposed nail holes that allow water penetration and long-term damage to the decking.
For permanent structural options like rafter ties and truss connectors, installation is done during framing and must follow manufacturer specifications and local building codes. These are not suitable for DIY installation, as improper placement can compromise wind uplift or snow load resistance.
Roofing Brackets vs. Other Staging Options
| Staging Method | Safety Level | Best Use Case | Limitation |
| Roofing Brackets with Staging Board | High | Residential sloped roofs | Requires correct pitch rating |
| Full Scaffolding System | Very High | Commercial or multi-story projects | Expensive to set up |
| Ladder Only | Low | Very minor spot repairs | No stable horizontal work area |
| Toe Board Without Support | Very Low | Not recommended | No structural anchor, serious fall risk |
For most residential roofing projects in Winnipeg, properly installed roofing brackets with staging boards offer the best balance of safety, cost-effectiveness, and practicality. Full scaffolding systems are typically reserved for multi-story commercial work where crews need extended access over several days.
Things to Know About Roofing Brackets
Before purchasing or using these components on any project, keep these practical points in mind.
These supports are rated for specific pitches, and using the wrong pitch rating creates a tilted staging board that is dangerous rather than protective. Always match them to your actual roof pitch before purchasing. Most adjustable models cover a range of pitches, but fixed-angle brackets do not, so measuring your roof slope first is necessary.
Not all of them work with all roof materials. Nail-on versions cannot be used on metal roofs without risking leaks and voiding the roofing warranty. Always confirm compatibility with your specific roofing surface before ordering.
In Canada, workplace safety requirements can extend to homeowners who hire contractors. If a roofing crew is on your property without proper fall protection, liability can involve the property owner. Confirming that your contractor uses appropriate staging and safety equipment is both a safety measure and a legal protection.
Any bracket showing signs of bending, cracking, or significant rust should be retired immediately. Damaged supports can fail under load without warning. Inspect every bracket before each use and replace any that show structural compromise.
If you are planning a residential roof installation or a shingle roof replacement, understanding how roofing brackets work will help you ask better questions when speaking with your contractor and ensure the project meets proper Canadian safety standards.
For specific pricing on roofing services in Winnipeg, contact Zega Roofing directly for an accurate quote based on your property.
Why Professional Support Matters in Winnipeg
Winnipeg’s climate puts roofs through extreme conditions year-round. Summers bring intense UV exposure, while winters deliver heavy snowfall, ice damming, and freeze-thaw cycles that stress every component of a roofing system. Roofing brackets, especially structural ones like rafter ties and snow guard systems, must be installed with that climate-specific knowledge in mind.
At Zega Roofing, our team brings over 25 years of experience working with roofing systems across Manitoba. We know exactly which roofing brackets are appropriate for each application, how to install staging systems that comply with safety standards, and which structural connectors meet Canadian building code requirements. Whether you are planning a complete replacement, commercial roofing repairs, or need an expert assessment of your existing roof, our team delivers honest evaluations, quality materials, and professional workmanship on every job. Contact us at +1 204-997-2697 to schedule a free inspection.
Frequently Asked Questions About Roofing Brackets
Can I install roofing brackets myself?
Temporary staging brackets can be a DIY task for experienced homeowners, but structural brackets should always be installed by a licensed professional.
Roof jacks used for staging can be placed by homeowners who understand roof structure and fall protection requirements. However, structural roofing brackets such as rafter ties and truss connectors involve building code compliance and load-bearing considerations that exceed basic DIY knowledge. Improper placement can compromise the roof assembly in ways not visible until a major failure occurs.
What are the disadvantages of roofing brackets?
They leave nail holes, require exact pitch matching, and become hazardous when damaged or improperly installed.
Nail-on versions penetrate the roof decking and leave holes that must be covered correctly by the overlapping shingle course. If the installation sequence is off, these holes become leak points. Brackets not matched to the correct pitch create an uneven staging surface that increases fall risk. Reusing bent or rusted hardware is a serious hazard because metal fatigue causes sudden failure under load.
How are roofing brackets installed?
They are nailed into rafters at an upward angle, then a staging plank is placed across them to create a level work surface.
Roofing brackets are aligned over rafter locations and secured with two or three large nails driven at an angle that locks the bracket under the worker’s weight. A staging plank is inserted through the bracket opening. After work in that section is complete, the brackets are removed by striking them upward, and the overlapping shingle course covers the nail holes.
What is the 1 to 300 rule for ventilation?
It means one square foot of ventilation for every 300 square feet of attic floor space when a vapour barrier is present.
This building code guideline governs attic ventilation design. For every 300 square feet of attic floor area, at least one square foot of net free ventilation must be provided, split evenly between soffit intake and ridge exhaust. Without a vapour barrier, a stricter 1 to 150 ratio may apply. Proper ventilation prevents moisture buildup, reduces ice damming, and extends the life of the entire roofing system.
Do I need vent baffles in every rafter?
Yes, installing vent baffles in every rafter bay ensures consistent airflow and prevents moisture issues throughout the attic.
Vent baffles are installed between rafters at the soffit line to create a clear airflow channel from eave intake vents up to ridge exhaust vents. Installing them in every rafter bay ensures no sections are blocked by insulation, which would create moisture pockets. In Winnipeg’s cold winters, skipping baffles in even a few rafter bays leads to moisture damage in decking, insulation, and framing.