When you install roof shingles, the process involves preparing the roof deck, laying underlayment, applying starter strips, and then placing each row of shingles with proper nailing and overlap. Getting this right protects your home from leaks, ice dams, and wind damage for decades.
Roof shingles are one of the most popular roofing options across Canada, and for good reason. They offer solid weather protection, they look great on almost any style of home, and they hold up well through harsh winters and hot summers when installed correctly.
But the way you install roof shingles matters just as much as the materials you choose. A poor installation leads to premature wear, water damage, and costly repairs down the road.
Why It Matters to Install Roof Shingles Correctly
A roof is your home’s first line of defense against rain, snow, ice, and wind. When you install roof shingles the right way, you create a watertight barrier that channels moisture off the roof and away from the structure. Improper installation, on the other hand, creates gaps and weak points where water seeps in and causes rot, mould, and structural damage over time.
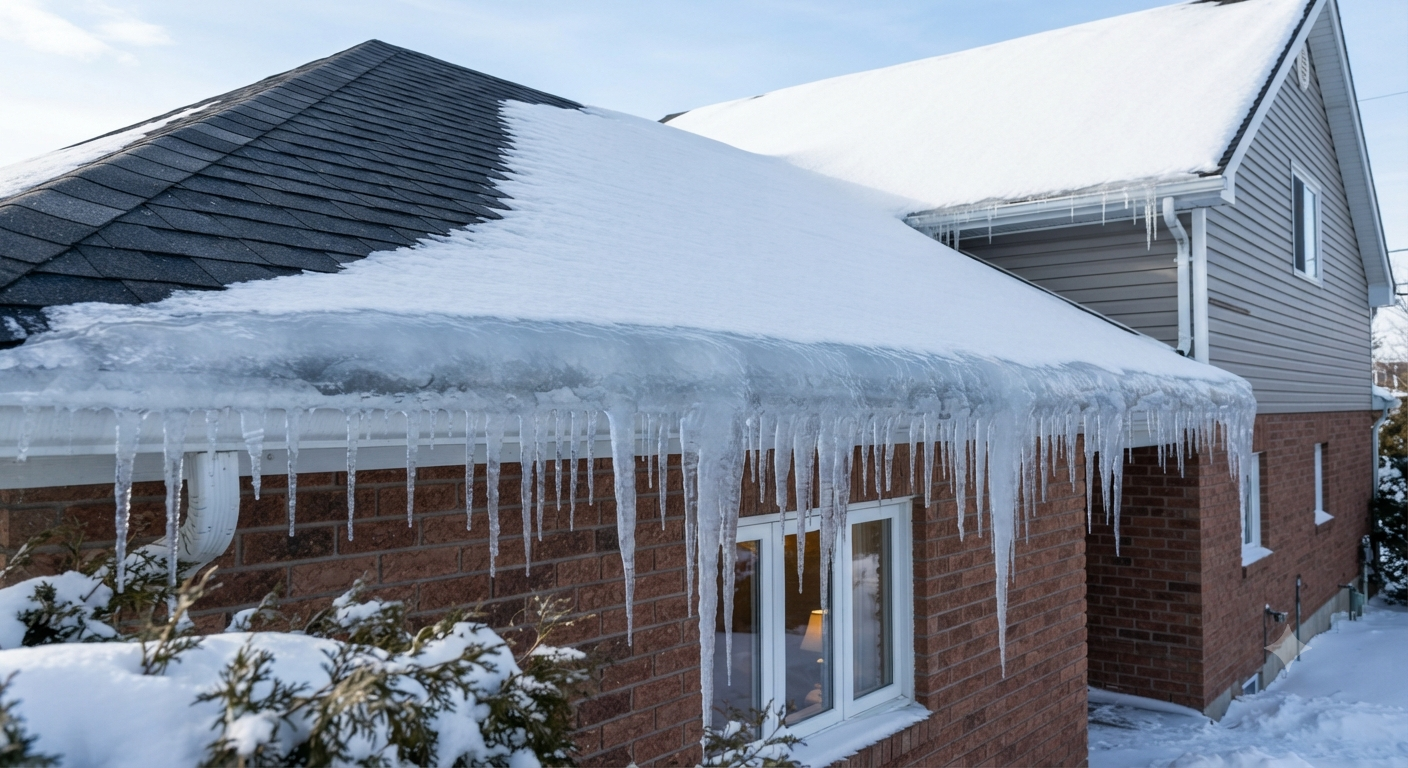
In Canadian climates, the stakes are even higher. Freeze-thaw cycles put enormous stress on roofing materials, and heavy snow loads test every nail and seal line. Shingles that are not properly secured will lift during high winds, and those that lack adequate overlap will allow ice dams to push water underneath the surface.
Correct installation also ensures your manufacturer warranty stays valid, because most warranties require professional-grade workmanship. Cutting corners during the process might save a few hours upfront, but it almost always leads to expensive problems within the first few years.
Materials and Tools You Need to Install Roof Shingles
Before you install roof shingles, you need to gather everything required for the job. Having all your supplies ready prevents delays and ensures a smooth workflow from the first row to the ridge cap.
Roofing Materials Checklist
You will need asphalt shingles (enough to cover your roof area plus 10% extra for waste and cuts), roofing underlayment (synthetic or felt), starter strip shingles, drip edge flashing, ice and water shield membrane for eaves and valleys, ridge cap shingles, and roofing nails. Each of these plays a specific role in creating a layered system that keeps water out.
Essential Tools
The tools required include a roofing nail gun or hammer, chalk line, utility knife with extra blades, tape measure, pry bar, roofing shovel (if removing old shingles), ladder with stabilizer, and a safety harness. A chalk line is especially important because it helps you keep your shingle rows straight across the entire roof surface, which is critical for both appearance and function.
Safety Equipment
Roof work is dangerous, and falls are the leading cause of injury in residential construction. You need non-slip roofing boots, a safety harness with a roof anchor, work gloves, and eye protection. If you are working on a steep-slope roof, consider scaffolding or roof brackets for added stability.

Step-by-Step Process to Install Roof Shingles
Learning how to install roof shingles involves following a specific sequence. Skipping steps or doing them out of order creates problems that may not show up until months later when water starts finding its way inside.
Step 1: Prepare the Roof Deck
Remove old shingles down to the bare deck if needed. Inspect the plywood or OSB sheathing for rot, soft spots, or damage. Replace any compromised sections before moving forward. The deck must be clean, dry, and structurally sound before you add any new layers.
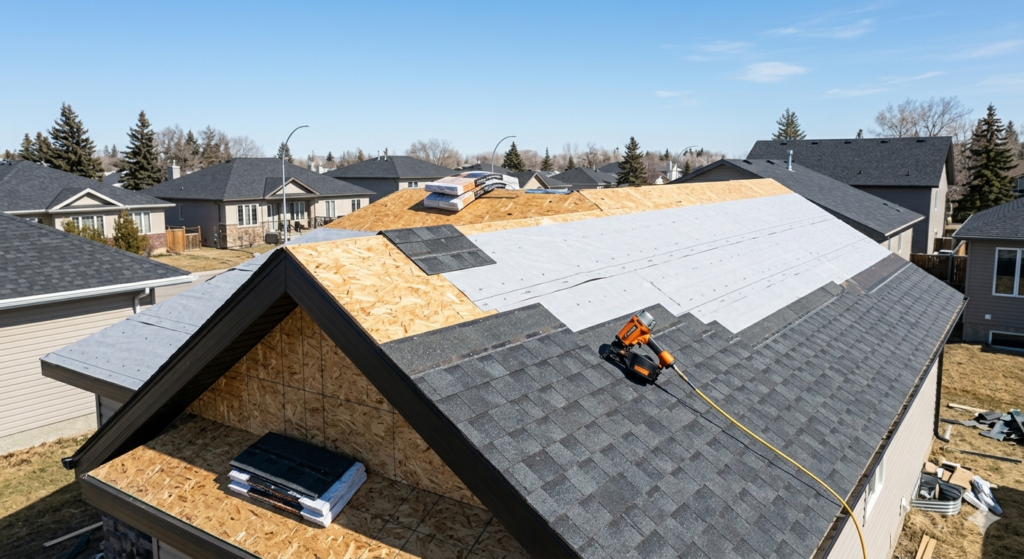
Step 2: Install Drip Edge and Underlayment
Attach drip edge flashing along the eaves first, then roll out your underlayment across the entire roof deck. The underlayment acts as a secondary moisture barrier. In cold-climate regions like Winnipeg, apply ice and water shield membrane along the eaves extending at least 24 inches past the interior wall line. This prevents ice dam leakage. Then install drip edge along the rakes (the sloped edges) on top of the underlayment.
Step 3: Apply Starter Strip Shingles
Starter strips go along the bottom edge of the roof. They provide the adhesive seal line for your first course of shingles and prevent wind-driven rain from getting underneath. Position the starter strip so it overhangs the drip edge by about 6 to 10 millimetres.
Step 4: Lay the First Course of Shingles
Your first row of shingles sits directly on top of the starter strip. Align the bottom edge with the starter strip edge, and nail according to the manufacturer’s specifications. Most shingles require four to six nails placed in the designated nailing zone, which is typically just below the adhesive strip.
Step 5: Continue With Offset Rows
Each new row should be offset from the one below it. The standard offset is about 150 millimetres (6 inches) for a staggered look that prevents water from following a straight seam. Continue working your way up the roof, snapping a chalk line every few rows to keep everything aligned.
Step 6: Install Ridge Cap Shingles
When you reach the peak, install ridge cap shingles along the ridge line. These specialized pieces wrap over the top and seal the junction between both roof slopes. Nail them securely and ensure each piece overlaps the one before it.
| Installation Step | Key Detail | Common Mistake |
| Deck preparation | Replace damaged sheathing | Covering rotted wood with new shingles |
| Underlayment | Overlap seams by at least 100 mm | Leaving gaps between underlayment rows |
| Starter strip | Overhang drip edge by 6-10 mm | Forgetting the starter strip entirely |
| First course | Align with starter strip edge | Misaligning the first row which throws off the whole roof |
| Offset rows | Stagger each row by 150 mm | Lining up seams vertically |
| Ridge cap | Overlap each piece properly | Using cut field shingles instead of proper ridge caps |
The Correct Nailing Pattern When You Install Roof Shingles
Nailing is one of the most overlooked parts of the process, but it is arguably the most important. When you install roof shingles with the wrong nailing pattern, you risk blow-offs, leaks, and voided warranties.
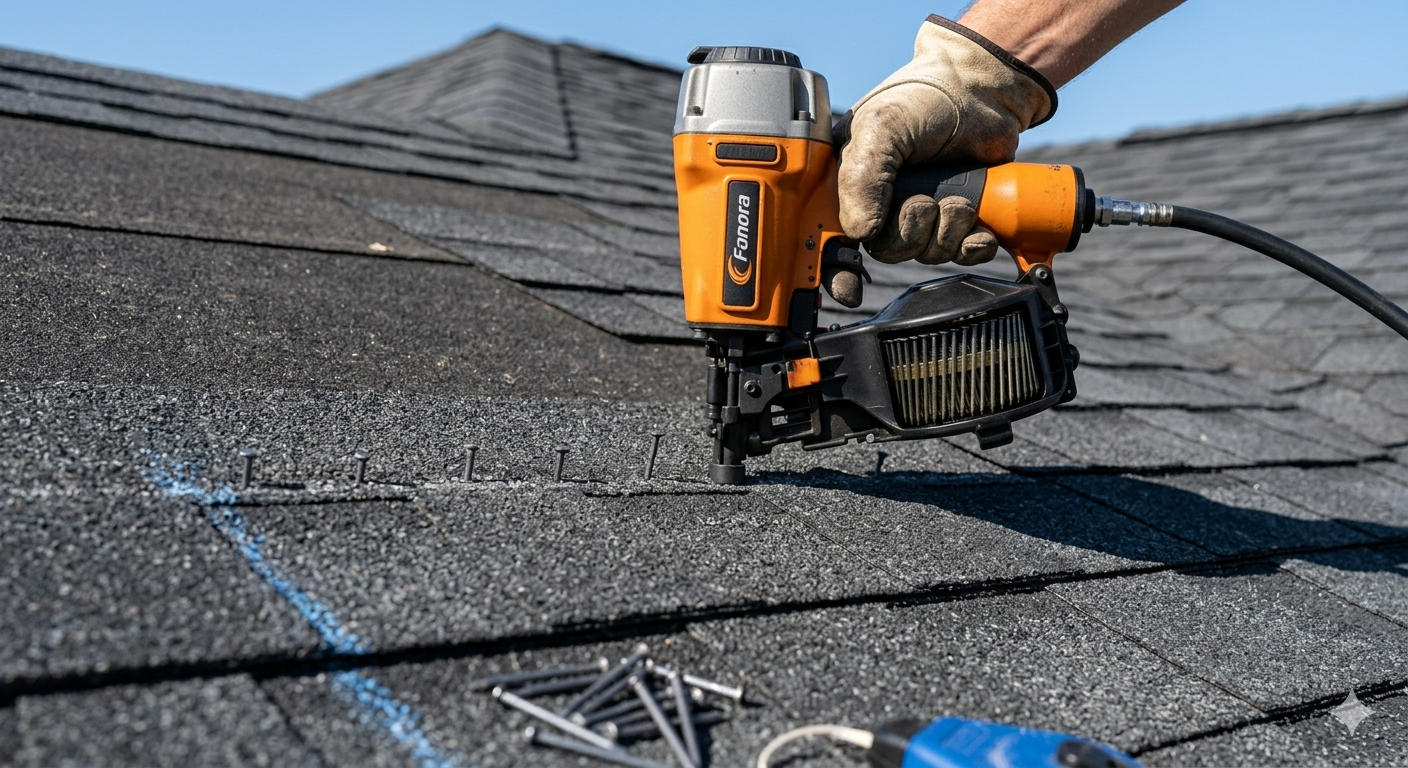
Most asphalt shingles require four nails per shingle in standard conditions. In high-wind zones, six nails per shingle is recommended. The nails should be placed in the manufacturer’s designated nailing zone, which is usually a narrow strip located about 25 millimetres below the adhesive line. Nails driven too high miss the underlying shingle and create a weak bond. Nails driven too low sit in the exposed area and become entry points for water.
Each nail should be driven straight, not angled, and the head should sit flush with the shingle surface. Overdriven nails tear through the material. Underdriven nails leave the head raised, which pushes up the shingle above and creates a gap. Using a properly calibrated pneumatic nail gun helps maintain consistent depth across every shingle.
| Nailing Issue | What Happens | How to Avoid It |
| Nails too high | Shingles slip and blow off | Follow the marked nailing line on each shingle |
| Nails too low | Water enters through exposed nail heads | Keep nails within the adhesive zone area |
| Overdriven nails | Nail tears through the shingle material | Calibrate your nail gun pressure correctly |
| Underdriven nails | Raised nail heads push up the shingle above | Check depth after the first few nails and adjust |
| Crooked nails | Reduced holding power and potential cracking | Drive nails straight into the deck at 90 degrees |
Common Mistakes to Avoid When You Install Roof Shingles
Even if you follow every step, certain mistakes can undermine the entire job. Knowing what to watch for helps you avoid problems before they start.
One of the biggest errors is failing to install proper ventilation. Shingles need airflow underneath them to prevent moisture buildup in the attic, which causes premature aging of the roofing material. Another common mistake is reusing old flashing around chimneys, vents, and skylights. Old flashing may look fine on the surface but could be corroded or cracked underneath.
Skipping the ice and water shield in cold climates is another frequent issue. Canadian homeowners, especially in Manitoba, deal with ice dams every winter, and without that extra membrane layer, water will find its way inside. Not following the manufacturer’s installation instructions is also a problem because it voids the warranty and leaves you unprotected if something goes wrong.
Working in extreme cold is another concern. Most shingles should not be installed when temperatures drop below minus 5 degrees Celsius because the adhesive strips will not seal properly. If you need to install roof shingles during colder months, hand-sealing each tab with roofing cement is necessary.
Things To Know Before You Install Roof Shingles
There are several important details every homeowner should keep in mind before starting a shingle roofing project. These practical considerations can save you time, money, and frustration.
Your local building code may require a permit for roofing work, especially for full replacements. Check with your municipality before you begin. In Winnipeg and surrounding areas, most residential roofing projects require compliance with the Manitoba Building Code.
Roof slope affects shingle performance. Standard asphalt shingles work best on roofs with a slope of 4:12 or steeper. Lower-slope roofs need additional waterproofing measures or alternative roofing systems.
Weather timing matters. The ideal season to install roof shingles in Canada is late spring through early fall when temperatures consistently stay above 10 degrees Celsius. This allows the adhesive strips to activate and bond properly under sun exposure.
Always order more material than you think you need. A typical roof requires about 10 percent extra shingles to account for cuts, waste, and future repairs. Running short mid-project creates colour-matching headaches if you need to order from a different batch.
Proper attic ventilation is not optional. A balanced system of intake vents at the soffits and exhaust vents near the ridge keeps the attic temperature regulated and prevents moisture damage from the inside out.
When to Hire a Professional to Install Roof Shingles
While some homeowners feel comfortable tackling smaller roofing jobs, there are many situations where hiring a licensed contractor is the smarter choice. Steep roofs, multi-story homes, complex roof lines with valleys and dormers, and any project that involves structural repair all require professional expertise. The risk of personal injury combined with the potential for costly installation errors makes professional shingle roof replacement a worthwhile investment.
A professional roofing crew can install roof shingles much faster than a homeowner working alone, and they carry insurance that protects you from liability. Professionals also understand local building codes and can pull the necessary permits on your behalf. They know how to handle unexpected issues like hidden water damage, inadequate sheathing, or improper ventilation that only become visible once the old roofing is removed.
For pricing on a professional installation, contact Zega Roofing directly for a free estimate tailored to your specific project.
About Zega Roofing: Your Winnipeg Roofing Professionals
Zega Roofing is a trusted Canadian roofing company with 25 years of experience helping property owners across Winnipeg and surrounding areas. From minor leak repairs to complete roof overhauls, the team delivers dependable roofing and insulation solutions for both residential and commercial clients.
Zega Roofing is licensed, insured, and known for honest estimates, expert craftsmanship, and quality materials built to handle Manitoba’s toughest weather. Whether you need a residential roof installation, emergency repair, or attic insulation, you can reach the team at +1 204-997-2697 or visit the areas served page for more details.
Final Tips for Canadian Homeowners Who Install Roof Shingles
Getting the job done right the first time saves money and protects your home for years to come. Whether you choose to do the work yourself or bring in a professional team, every step of the process counts. From proper deck preparation and underlayment installation to precise nailing patterns and correct shingle overlap, each detail contributes to a roof that performs well through rain, snow, wind, and sun.
Canadian homeowners face unique challenges with cold-weather installation and ice dam prevention, so paying attention to climate-specific requirements is essential. Take the time to plan your project thoroughly, invest in quality materials, and never skip safety precautions when you install roof shingles on your property.
Frequently Asked Questions
How should shingles be installed on a roof?
Shingles should be installed starting from the bottom edge of the roof and working upward in staggered rows. Begin with a starter strip along the eaves, then lay the first course of shingles on top. Each row should overlap the one below it and be offset by about 150 millimetres to prevent aligned seams. Nail each shingle in the designated nailing zone, and finish with ridge cap shingles at the peak.
Can you install shingles yourself?
Yes, you can install shingles yourself if you have basic roofing knowledge and proper safety equipment. Small, single-story roofs with simple layouts are manageable for confident DIYers. However, steep roofs, complex designs, and multi-story homes are best left to licensed professionals who carry the right insurance and experience to handle unexpected issues safely.
What is the proper nailing pattern for shingles?
The proper nailing pattern requires four to six nails per shingle, placed in the manufacturer’s designated nailing zone. This zone sits just below the adhesive strip. Nails should be driven straight and flush with the shingle surface. In high-wind areas, using six nails instead of four provides extra holding power and prevents blow-offs during storms.
How to install the first layer of shingles on a roof?
The first layer starts with a starter strip placed along the eaves, followed by the first full course of shingles on top. The starter strip provides the adhesive bond that seals the bottom edge of the first row. Align the first course so it sits flush with or slightly overhangs the drip edge by about 6 to 10 millimetres, then secure with nails in the correct nailing zone.
Do I need to put anything under shingles?
Yes, you need roofing underlayment beneath the shingles as a secondary moisture barrier. In Canadian climates, an ice and water shield membrane is also recommended along the eaves, valleys, and around penetrations like chimneys and vents. These layers protect the roof deck from moisture that may get past the shingles during heavy rain, wind-driven snow, or ice dam events.