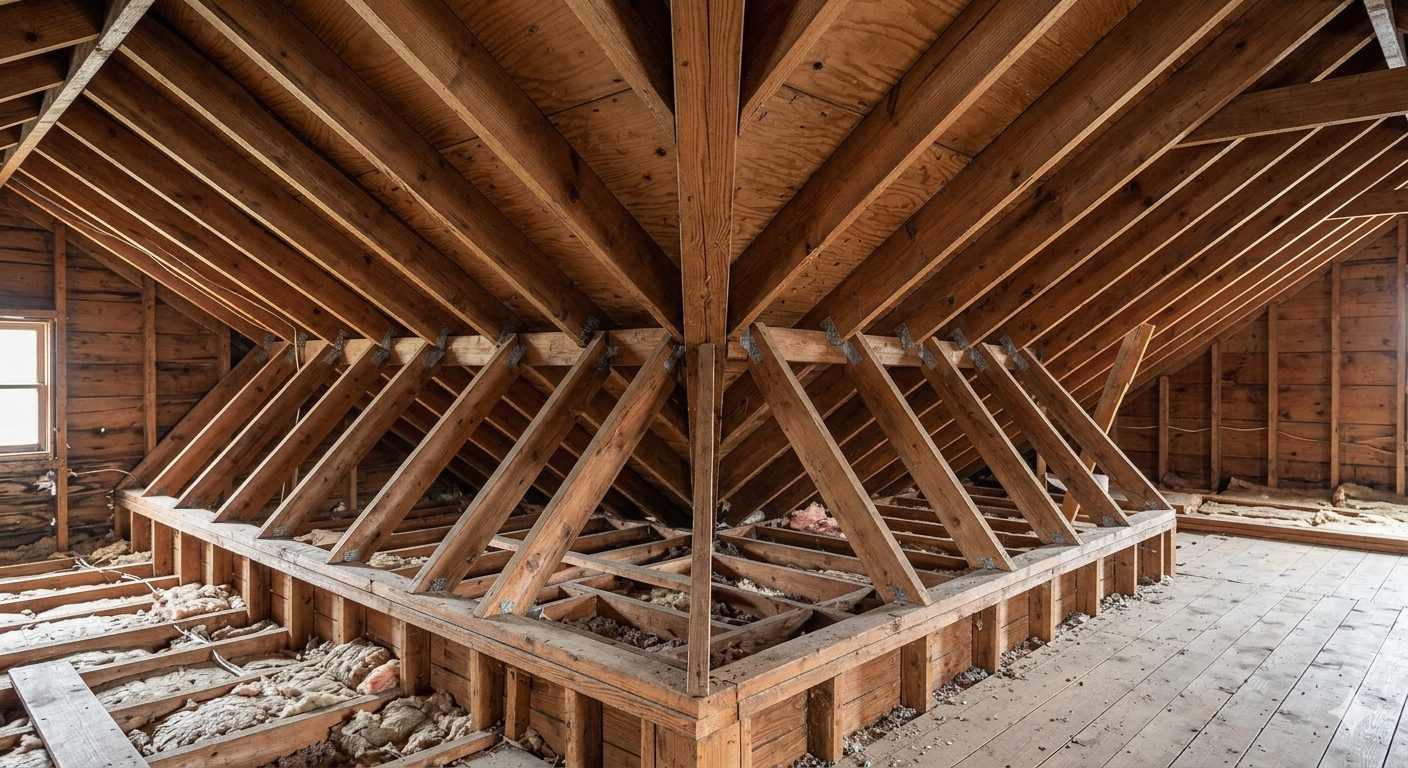
Roof to wall flashing is a thin metal barrier installed where your roofline meets a vertical wall, and it plays a critical role in preventing water from seeping into your home. Without proper roof to wall flashing, rainwater, snowmelt, and ice can travel behind your siding or shingles, causing rot, mold, and expensive structural damage over time.
In this content, you will learn why roof to wall flashing matters, the different types available, how the installation process works step by step, which materials perform best in Canadian climates, common mistakes to avoid, and practical tips for maintaining your flashing over the years.
Whether you are building a new home in Winnipeg or repairing an older roof, getting your roof to wall flashing right is one of the smartest investments you can make.
Why Roof to Wall Flashing Matters for Canadian Homes
Every time rain falls or snow melts on your roof, water flows downward along shingles and other roofing materials. When the roof meets a wall, that junction creates a natural gap where water can pool, collect, or redirect behind the exterior cladding. Roof to wall flashing acts as a redirect system that channels water safely away from these vulnerable areas and onto the shingles below.
In Winnipeg, where freeze-thaw cycles happen frequently between October and April, water that sneaks behind a wall can freeze, expand, and crack building materials from the inside out. Over a single winter season, unprotected roof-to-wall joints can develop leaks that go unnoticed until spring, when homeowners suddenly find water stains on interior ceilings and walls.
Beyond water damage, poor flashing leads to mold growth inside wall cavities. Mold remediation costs far more than installing quality roof to wall flashing from the start. If your home has a dormer, a chimney bump-out, or an addition where the roofline changes height and meets a sidewall, these are all spots that need properly installed flashing.
For homeowners looking at full roofing installation in Winnipeg, flashing should always be part of the conversation. It is never a corner to cut.
Types of Roof to Wall Flashing
Not all roof to wall flashing looks the same. The type you need depends on your roof pitch, wall material, and the specific transition point being protected. Here are the most common types used in residential and commercial roofing.
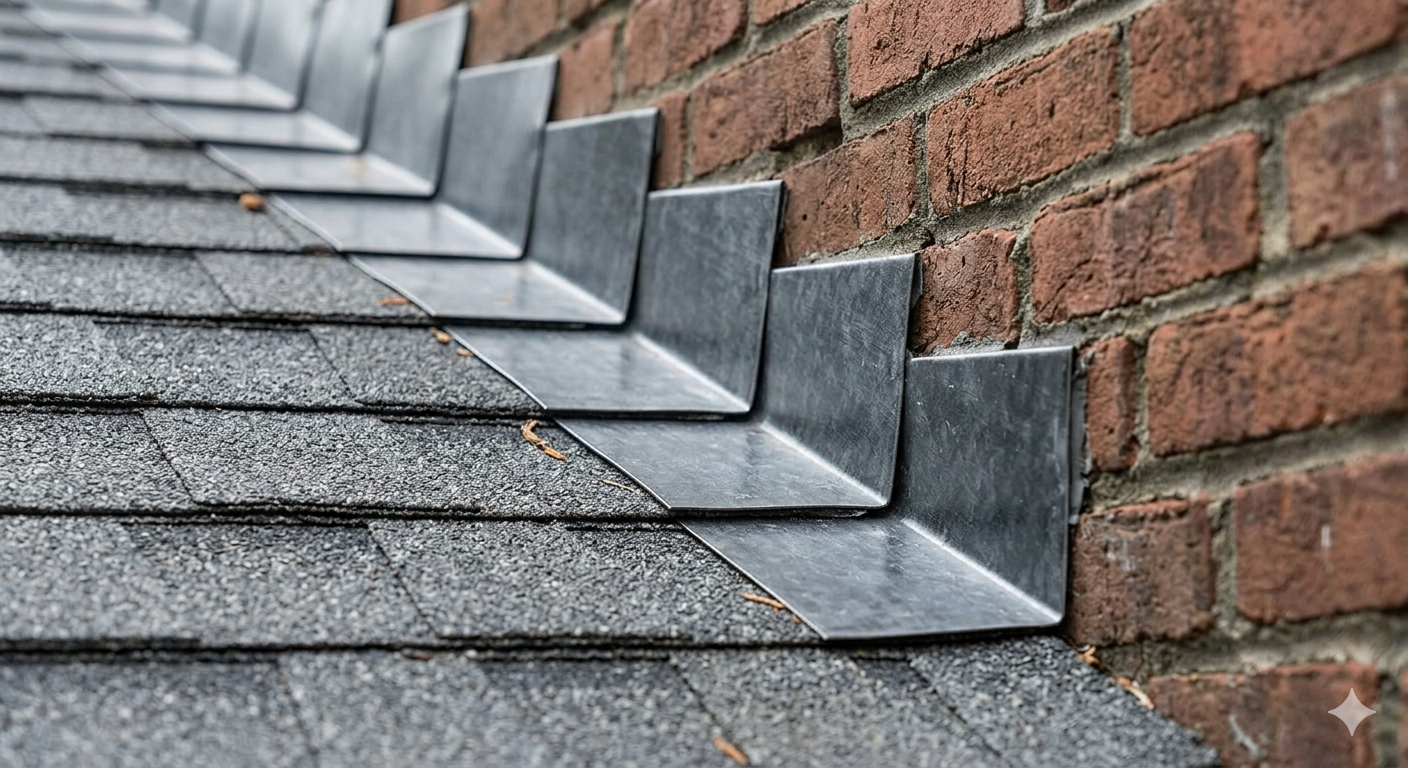
Step Flashing
Step flashing is the most widely used type for sloped roofs. It consists of individual L-shaped metal pieces that are woven between each course of shingles along the wall. Each piece overlaps the one below it, creating a stair-step pattern that directs water away from the wall and back onto the roof surface. Step flashing works well on most Winnipeg homes because it handles heavy rain and snowmelt efficiently.
Continuous Flashing (Apron Flashing)
Continuous flashing, sometimes called apron flashing, is a single long piece of metal that runs along the base of a wall where it meets a low-slope or flat roof section. It is bent into an L-shape and tucked behind the siding while extending over the roofing material below. This type of roof to wall flashing is common on commercial buildings and on residential homes where an addition meets the main structure.
Kick-Out Flashing
Kick-out flashing is a small but important piece installed at the bottom end of a roof-to-wall intersection, right where the roof edge meets the gutter. Its job is to redirect water into the gutter rather than letting it run down the wall. Many older homes in Winnipeg are missing kick-out flashing entirely, which leads to staining and rot on exterior walls over time.
Counter Flashing
Counter flashing is a second layer that sits on top of step flashing or continuous flashing. It is typically embedded into a mortar joint on a brick or stone wall and folds down over the top edge of the base flashing. This two-layer approach creates a double barrier against water infiltration and is especially useful in areas with heavy rainfall or frequent ice buildup.
Roof to Wall Flashing Materials Compared
Choosing the right material for your roof to wall flashing affects how long it lasts and how well it performs through harsh Canadian winters. Below is a comparison of the most commonly used materials.
| Material | Durability | Best Use | Maintenance Level |
| Galvanized Steel | 15 to 25 years | Budget-friendly residential projects | Moderate, can rust over time |
| Aluminum | 20 to 30 years | Lightweight applications, coastal areas | Low, resists corrosion well |
| Copper | 50 years or more | Premium homes, historic restorations | Very low, develops natural patina |
| Lead-Coated Copper | 50 years or more | High-end residential and commercial | Very low, excellent weather resistance |
| Rubber or Synthetic | 10 to 20 years | Temporary fixes, flat roof sections | Moderate, degrades with UV exposure |
For most Winnipeg homes, galvanized steel or aluminum roof to wall flashing provides the best balance of cost and performance. Copper is a premium option that looks great and lasts decades, but it comes at a higher price point. If you want to know exactly what material suits your property best, reaching out to a professional roofer is the safest route.
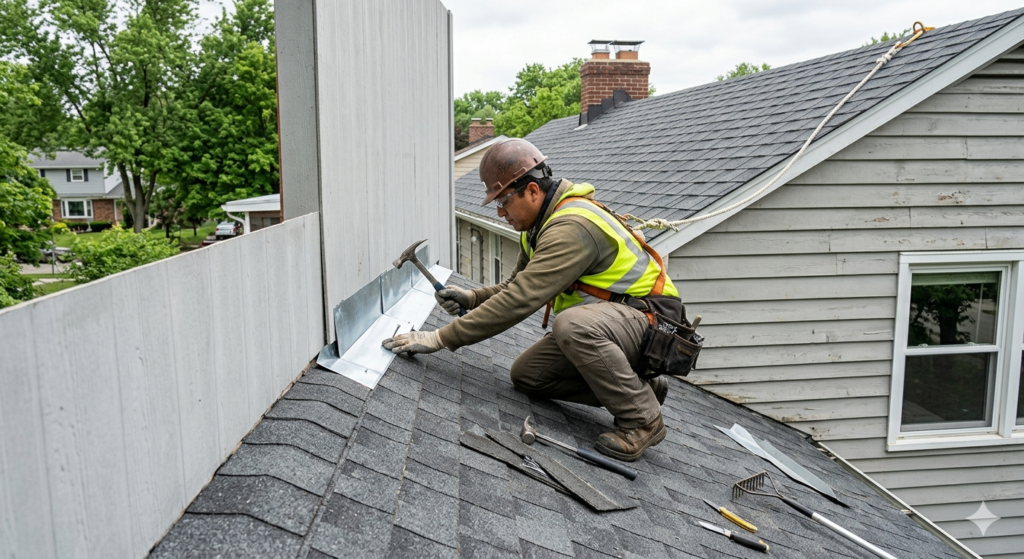
How Roof to Wall Flashing Is Installed Step by Step
Proper installation of roof to wall flashing requires attention to detail and an understanding of how water behaves on a roof surface. Here is how the process typically works for a standard step flashing application on a sloped roof.
First, the roofing contractor removes the old siding or trim along the wall where the roof meets it. This exposes the sheathing underneath and allows the installer to see whether there is existing damage, rot, or moisture buildup that needs repair before new flashing goes in.
Next, an ice-and-water shield membrane is applied along the roof-to-wall junction. This self-adhesive underlayment acts as a secondary barrier in case any water gets past the metal flashing. In Winnipeg, where ice dams are a regular concern, this membrane layer is especially important.
After the membrane is in place, the installer begins laying shingles from the bottom of the roof upward. At each course of shingles along the wall, a piece of step flashing is placed so that it sits on top of the shingle and extends up behind the wall cladding by at least four inches. Each successive piece of step flashing overlaps the one below it by at least two inches.
Once all the step flashing is installed, the siding or trim is reinstalled over the top flange of the flashing. The siding should never be nailed through the flashing itself, because that creates holes where water can enter. Instead, siding is fastened above the flashing line, and a small gap is left at the bottom to allow water to drain freely.
Finally, sealant is applied at key transition points, but sparingly. Over-relying on caulk is a common mistake. Sealant is a temporary fix that breaks down within a few years, while properly overlapped roof to wall flashing can last decades without any sealant at all.
If you are planning a shingle roof replacement in Winnipeg, make sure your contractor includes flashing replacement as part of the project scope.
Common Roof to Wall Flashing Mistakes to Avoid
Even experienced DIY homeowners make errors with roof to wall flashing that lead to leaks down the road. Knowing what to avoid can save you thousands of dollars in water damage repairs.
One of the most frequent mistakes is using caulk as a substitute for flashing. Caulk degrades with UV exposure, temperature changes, and moisture, often cracking within two to five years. Flashing should always be the primary water barrier, with caulk used only as a secondary measure at specific transition points.
Another common error is nailing through the face of the flashing instead of along the top edge. Every nail hole in the exposed portion of flashing becomes a potential entry point for water. Nails should always be placed high on the flashing where they will be covered by the next course of shingles or siding.
Skipping the kick-out flashing at the bottom of a roof-to-wall intersection is another mistake that causes trouble. Without it, water runs directly down the exterior wall, causing staining, rot, and even foundation damage over time.
Using mismatched metals is also problematic. When two different metals touch each other in the presence of moisture, a chemical reaction called galvanic corrosion occurs. For example, putting aluminum flashing against copper gutters will cause the aluminum to deteriorate quickly. Always use compatible metals throughout your roof to wall flashing system.
When to Replace or Repair Your Roof to Wall Flashing
Roof to wall flashing does not last forever, and certain signs indicate it is time for a replacement or repair. If you notice water stains on interior walls near the roofline, peeling paint on exterior walls below a roof junction, or visible rust or separation on the flashing itself, these are clear signals.
| Warning Sign | What It Means | Recommended Action |
| Water stains on interior ceiling or walls | Flashing may be compromised or missing | Professional inspection and possible replacement |
| Rust or corrosion visible on flashing | Metal is breaking down and losing effectiveness | Replace the affected flashing sections |
| Siding pulling away from wall near roofline | Water may be getting behind the cladding | Check flashing and reseal or reinstall |
| Ice dams forming at roof-to-wall junction | Poor underlayment or flashing overlap | Add ice-and-water shield and correct flashing |
| Mold smell in upper floor rooms | Moisture is trapped inside the wall cavity | Immediate inspection and remediation |
In Winnipeg, the best time to inspect your roof to wall flashing is during the fall before snow arrives. Catching small issues before winter prevents them from turning into major leaks during the spring thaw.
For pricing on flashing repairs or full replacements, contact Zega Roofing directly at +1 204-997-2697 for a free inspection and honest estimate.
Things to Know About Roof to Wall Flashing
Before you hire a contractor or attempt a repair, keep these practical tips in mind.
Roof to wall flashing should extend at least four inches up the wall surface and at least four inches onto the roof deck. Anything less than that does not provide adequate protection against wind-driven rain.
Always pair your flashing with an ice-and-water shield membrane in cold climates like Winnipeg. The membrane catches any water that gets past the metal and prevents it from reaching the wood sheathing.
If your home has stucco walls, the flashing needs to be integrated with a weep screed at the bottom of the stucco to allow trapped moisture to escape. This is a detail that many contractors overlook.
Roof to wall flashing should be inspected every time you have your roof serviced. Even minor shifting or lifting can create gaps that let water in during heavy storms.
Homes with multiple dormers or complex rooflines require more flashing transitions, which increases the number of potential failure points. If your Winnipeg home has a complicated layout, hiring a professional is strongly recommended.
For homeowners curious about full residential roof installations, flashing work is always included in a comprehensive roofing project.
About Zega Roofing
Zega Roofing is a trusted Canadian roofing company serving Winnipeg and surrounding areas with over 25 years of experience. From emergency leak repairs to complete roof replacements, Zega Roofing delivers dependable solutions for residential and commercial clients.
The team is fully licensed, insured, and committed to quality materials and expert craftsmanship designed to handle Manitoba’s toughest weather conditions. To learn more about the service areas and view past projects, visit the areas served page or browse the project gallery.
Protecting Your Home Starts with Roof to Wall Flashing
Roof to wall flashing is one of those behind-the-scenes roofing components that most homeowners never think about until something goes wrong. But as you now know, getting it right from the start prevents costly water damage, mold growth, and structural problems that worsen with every passing season. Whether you need new flashing installed during a roof replacement or want an inspection on your existing setup, working with experienced professionals makes all the difference. For Winnipeg homeowners, Zega Roofing is ready to help with a free roofing inspection and expert advice tailored to Manitoba’s climate. Call +1 204-997-2697 today to schedule your appointment.
Frequently Asked Questions About Roof to Wall Flashing
What is roof-to-wall flashing called?
Roof-to-wall flashing is most commonly referred to as step flashing when used on sloped roofs. When installed as a single continuous piece along a flat or low-slope section, it is called apron flashing or continuous flashing. The small piece at the bottom of the junction that redirects water into the gutter is called kick-out flashing. All of these terms describe specific components within the roof to wall flashing system.
How to flash between wall and roof?
The standard method involves weaving L-shaped metal pieces between each course of shingles along the wall. Start by applying an ice-and-water shield membrane to the junction area. Then, as you lay each row of shingles moving upward, place a piece of step flashing so it sits on top of the shingle and extends up behind the wall cladding. Each piece should overlap the one below by at least two inches.
How to seal between wall and roof?
Sealing a roof-to-wall junction relies primarily on properly installed metal flashing rather than caulk alone. Metal flashing overlaps in a way that physically redirects water, while sealant fills small remaining gaps at transition points. Apply a bead of roofing sealant where the top edge of the flashing meets the wall, but never depend on sealant as your only line of defense against water.
What is the purpose of wall flashing roof?
The purpose of roof to wall flashing is to prevent water from penetrating the gap where a roof surface meets a vertical wall. Without flashing, water follows gravity and surface tension into the joint, soaking into wall sheathing and causing rot, mold, and structural weakening over time. Properly installed flashing redirects that water back onto the roof surface and into the gutter system.
What is the best type of roof flashing?
For most residential homes in Canada, galvanized steel or aluminum step flashing offers the best combination of durability, cost, and performance. Copper flashing lasts the longest and resists corrosion better than any other option, but it costs significantly more. The best type for your home depends on your budget, roof pitch, wall material, and local climate conditions. A professional assessment can help determine the right fit for your specific situation.