A roofing ice shield is a self-adhering waterproof membrane installed along the lower edges of your roof to prevent water from ice dams from seeping underneath your shingles and into your home. In cold climates like Winnipeg, where freeze-thaw cycles are a seasonal reality, this membrane is one of the most critical layers of protection your roof can have.
If you have ever dealt with a leaking roof after a heavy snowfall followed by warmer temperatures, ice damming likely played a role. This article covers what the membrane does, exactly where it needs to go, how it works alongside the rest of your roofing system, and whether your home needs it right now.
You will also find answers to the most common questions homeowners ask about this layer of protection, along with practical tips for making sure your roof is properly equipped for the Canadian winter.
Why a Roofing Ice Shield Matters for Canadian Homes
Canada’s climate is tough on roofs. In cities like Winnipeg, temperatures can swing dramatically between seasons, and within a single week a roof might be buried under snow, then exposed to above-freezing temperatures, then refrozen overnight. That cycle is exactly where the damage happens.
When snow accumulates on a roof and the attic below generates warmth, the snow near the ridge begins to melt. That water travels down the slope toward the cold eaves, where it refreezes and forms an ice dam. As the dam builds, it forces water back under the shingles. Without a roofing ice shield in place, that water finds its way into the roof deck, insulation, and eventually the interior of your home.
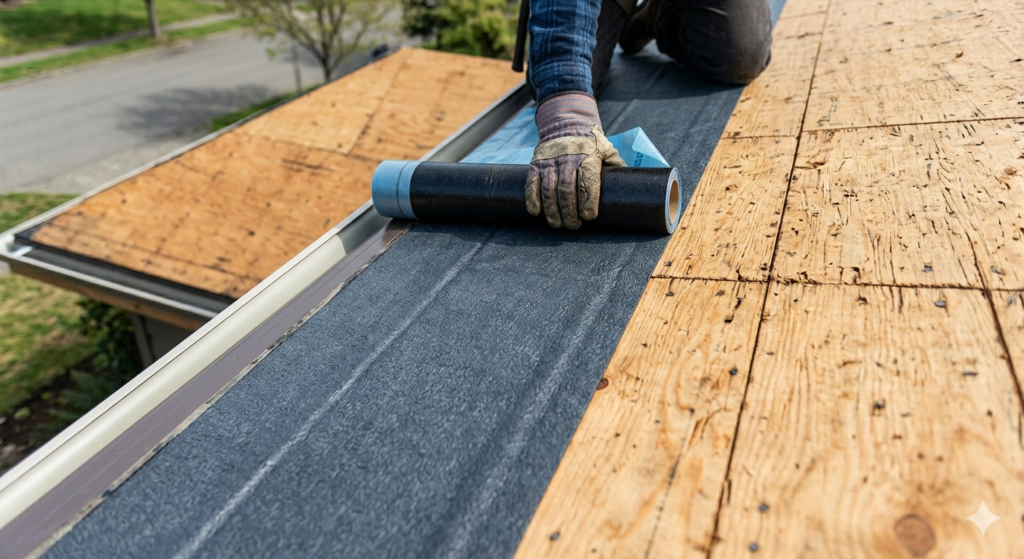
The membrane is designed specifically for this scenario. It is a rubberized, self-adhering product that bonds tightly to the roof deck and seals around nails, which means water cannot find a path through. Even when an ice dam forces water to sit and pool along the eave for days at a time, the barrier keeps it from getting any further into the structure.
Beyond ice dams, a roofing ice shield also provides protection from wind-driven rain, which can push water horizontally under shingles during storms. It adds a secondary line of defence that works behind your shingles year-round, not just during winter. For homes in Manitoba and across the Canadian prairies, this layer is not optional. It is a building code requirement in many areas and a practical necessity everywhere else.
If you are planning a residential roof installation, making sure proper roofing ice shield coverage is included in the scope of work is one of the most important conversations to have with your contractor before work begins.
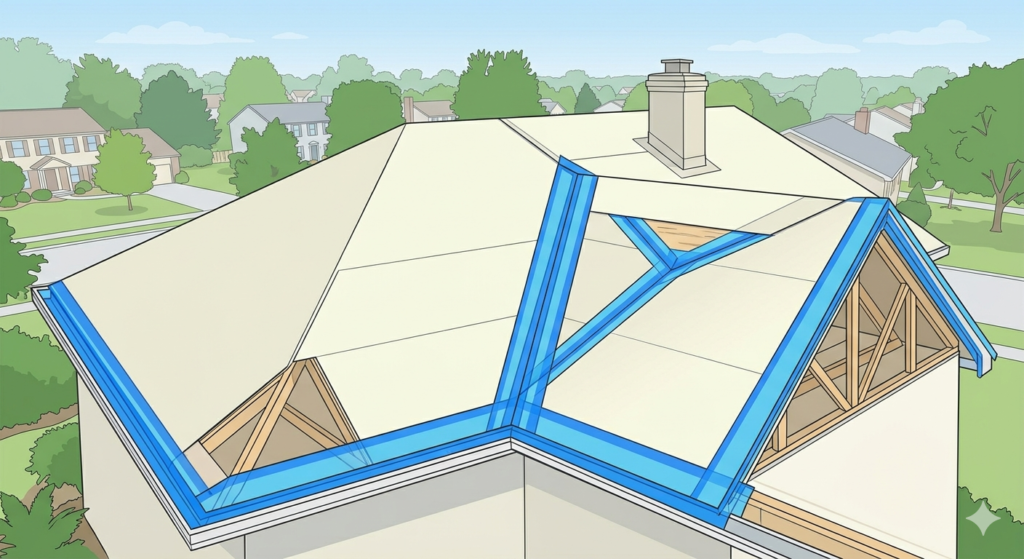
Where Do You Install a Roofing Ice Shield on a Roof?
Placement matters just as much as the product itself. Installing a roofing ice shield in the wrong location or not extending it far enough defeats its purpose entirely. There are established rules and code requirements that guide proper application, and understanding them helps homeowners know whether their roof was done correctly.
Along the Eaves
The primary location is along the eaves, the lowest edge of the roof. This is where ice dams form and where water backs up when they do. The membrane should extend from the drip edge inward, past the interior wall line. In most Canadian building codes, this means it needs to reach at least 900 millimetres inside the warm wall of the building.
Along Valleys
Roof valleys are the V-shaped channels where two slopes meet. Water naturally concentrates in these areas during rain and snowmelt, making them highly vulnerable to leaks. A strip of roofing ice shield should run the full length of every valley before underlayment and shingles go on top.
Around Penetrations
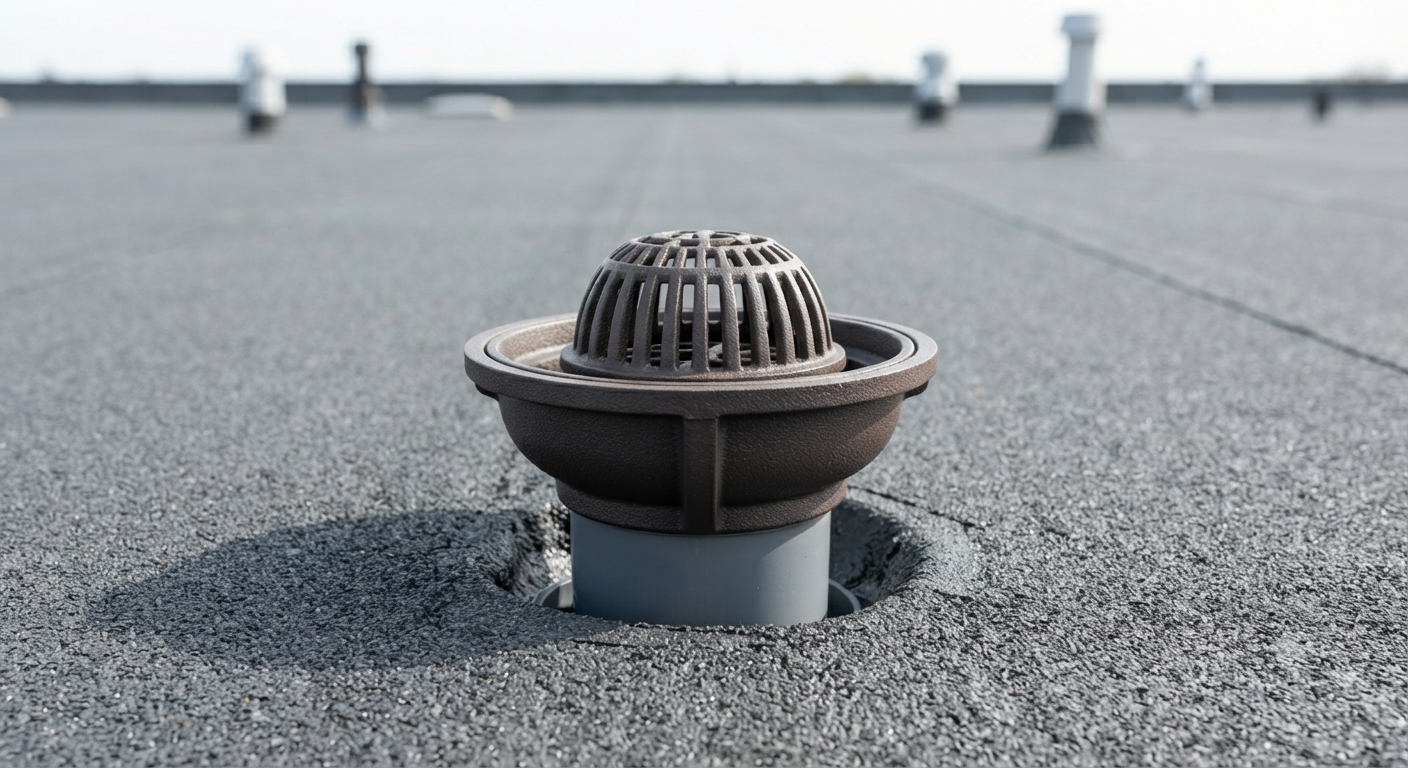
Chimneys, skylights, dormer walls, and vent stacks are areas where water can find a way in if flashing is even slightly imperfect. Applying the membrane around these penetrations provides additional insurance that works alongside flashing to keep water out.
On Low-Slope Roofs
Any roof with a pitch below 4:12 is considered low-slope and requires more aggressive coverage. At these angles, water drains more slowly and has more time to push under shingles. Many building codes require the membrane to cover the entire deck surface on very low-pitched roofs.
Along Rakes
The rakes are the sloped edges on the sides of a gable roof. High winds can push rain up under shingles along these edges, so adding a strip here offers extra protection in wind-prone locations like the Winnipeg prairies.
How a Roofing Ice Shield Works With the Rest of Your Roof
A roofing ice shield does not work alone. It is one component in a layered system that includes the roof deck, standard underlayment, flashing, ventilation, and the final roofing material. Understanding how these layers interact explains why proper installation from the start matters so much.
The roof deck provides the structural base. Over that goes the membrane at the eaves and valleys, followed by standard underlayment across the rest of the deck. Flashing is then installed at intersections and penetrations, and the final material goes on last. Each layer contributes to keeping water out, but the roofing ice shield is the one specifically engineered to handle backed-up water sitting in place for extended periods.
One detail that often surprises homeowners is nail sealing. Standard underlayment does not seal around fasteners. When nails are driven through regular felt paper, they leave small holes that water can exploit over time. Because a roofing ice shield is rubberized and self-adhering, it actually seals around nails as they are driven through, which closes off those entry points automatically.
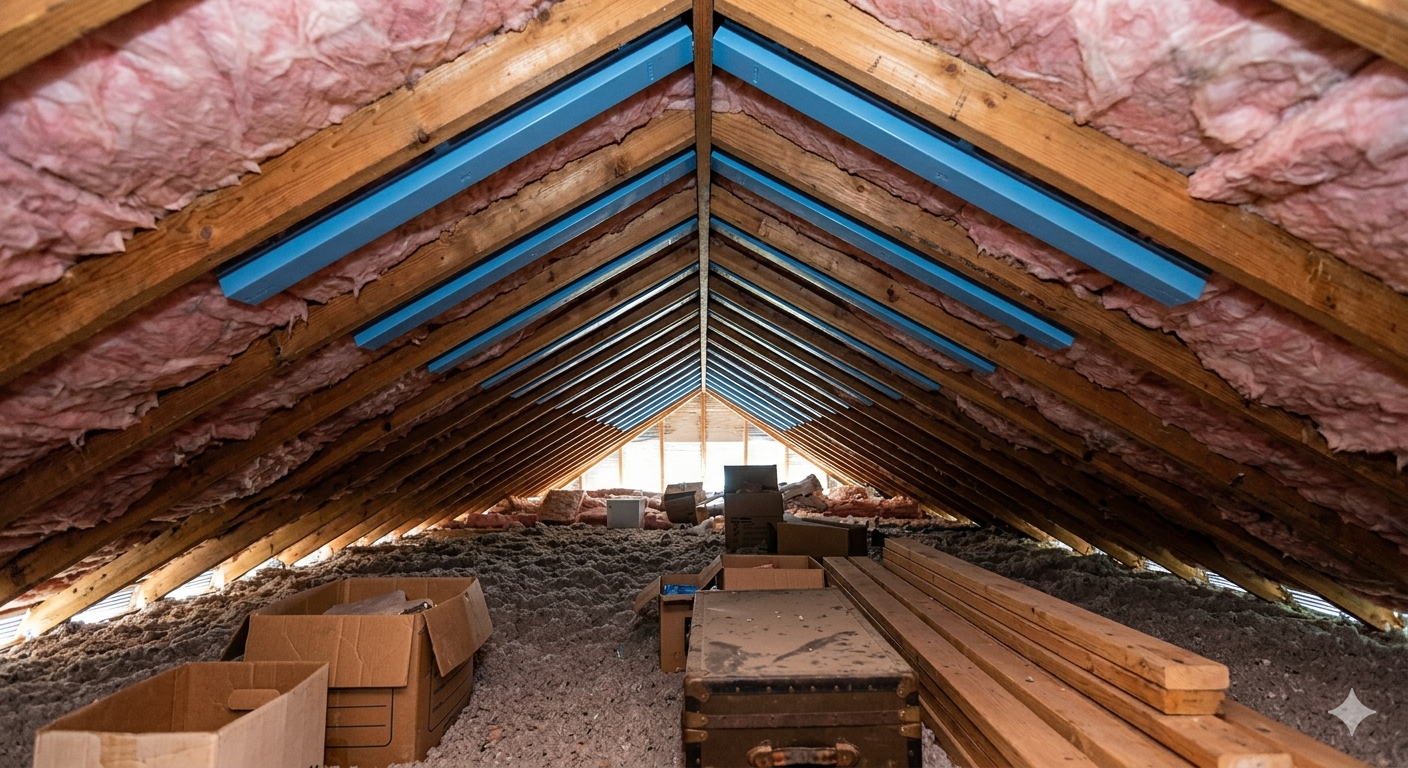
Proper attic ventilation works alongside the membrane. When attic air circulates correctly, it reduces the temperature differential that causes snow to melt unevenly on the roof surface. That means fewer ice dams in the first place. The roofing ice shield handles the situations where ice dams form anyway, but good ventilation reduces how often and how severely they occur. These two elements complement each other and should both be part of a well-designed roofing system.
For homes that already have spray foam insulation in Winnipeg, the combination of air sealing, insulation, and a properly installed membrane offers comprehensive winter protection from the inside and outside simultaneously.
The 1 to 300 Rule and How Ventilation Affects Your Roof
The 1 to 300 rule is the standard guideline for attic ventilation in residential construction. It states that for every 300 square feet of attic floor space, at least 1 square foot of net free ventilation area should be provided. This ratio helps maintain airflow that moderates attic temperature and reduces moisture buildup, both of which directly affect how often ice dams form.
When ventilation falls short of this ratio, heat accumulates in the attic more easily. That trapped heat accelerates uneven snow melt on the roof surface, leading to more frequent ice dam formation. A roofing ice shield cannot prevent dams from forming, but it is built to contain the damage when they do. Proper ventilation and a correctly installed membrane are complementary strategies that address the same problem from different directions.
Baffles, also called rafter vents, support ventilation by maintaining an open air channel between the insulation and the roof deck so cold air from soffit vents can travel up and out through the ridge vent. Without baffles, insulation can block soffit vents and undermine the airflow the entire system depends on. In areas prone to ice dam formation, baffle coverage should be thorough across all rafter bays.
Things To Know About Roofing Ice Shield
Before your next roofing project or inspection, these are practical points homeowners often do not learn until after a problem has already developed.
- It is permanent. Once adhered and covered by shingles, the membrane stays in place for the life of the roof. Choosing the right product and having it installed correctly the first time is essential.
- Not all products are equal. The quality, thickness, and adhesive strength of available membranes vary. In a climate like Winnipeg, a high-performance option offers significantly better long-term protection than a basic code-minimum product.
- Temperature matters during installation. The membrane needs to be applied within a certain temperature range to bond properly. In cold conditions, the adhesive may not activate correctly, which compromises the seal. Experienced installers know how to manage this on cooler days.
- It works alongside flashing, not instead of it. Both need to be correctly installed for the system to perform as intended. One does not replace the other.
- Older roofs may not have one at all. Homes built several decades ago were often roofed without this membrane. If your roof is approaching replacement age, ask your contractor to confirm what is there during the inspection.
- For pricing on roofing ice shield installation or a full roof replacement in Winnipeg, contact Zega Roofing directly at +1 204-997-2697 for an honest estimate based on your specific home.
How Zega Roofing Handles Roofing Ice Shield Installation
With 25 years of experience serving Winnipeg and surrounding communities, Zega Roofing understands the specific demands that Manitoba winters place on residential and commercial roofs.
Every installation includes a thorough inspection of the existing roof deck, correct membrane placement at all required locations, and materials selected for the local climate. Whether you need a full shingle roof replacement or are starting a new build, the team brings certified expertise and a commitment to work that holds up through every season.
Call +1 204-997-2697 or visit zegaroofing.ca to schedule your free inspection.
Frequently Asked Questions About Roofing Ice Shield
Do I need an ice shield on my roof?
Yes, especially in cold climates like Winnipeg.
If your home is located in a region that experiences freezing temperatures, snowfall, or freeze-thaw cycles, this membrane is a necessary part of your roofing system. Canadian building codes in most provinces require it along the eaves and in valleys on all residential roofs. Without it, ice dams can force water under your shingles and into the structure without any visible warning signs until the damage is already done. Even in milder areas, wind-driven rain can cause the same type of water intrusion during storms, making the membrane a worthwhile investment regardless of how severe your winters are.
Does ice and water shield actually work?
Yes, it is one of the most effective protective layers a roof can have.
It works by creating a watertight bond directly to the roof deck, and because it is self-adhering, it seals around nails and closes off the small punctures that fasteners create.
When an ice dam forces pooled water to sit against the eave, the membrane holds it back from penetrating into the roof structure. Decades of real-world performance in cold climates confirm that a properly installed roofing ice shield significantly reduces water intrusion from ice dams and storm-driven rain.
It is not a guarantee against all moisture problems, but it is the most targeted solution for the specific failure modes that cold climates produce.
How to protect a roof from ice?
Use a combination of roofing ice shield, proper attic ventilation, and insulation.
Protecting a roof from ice damage requires addressing the problem from multiple angles. Start with a properly installed membrane along the eaves, valleys, and other vulnerable areas.
Pair that with adequate attic ventilation to keep the roof deck temperature even so snow does not melt unevenly and form dams. Good attic insulation prevents warm indoor air from escaping into the attic and accelerating that uneven melt.
On especially vulnerable roofs, a roof rake can also be used after heavy snowfalls to reduce the snow load along the lower sections before melting begins. These strategies together give your roof the best possible protection through a Winnipeg winter.
What is an ice shield?
A self-adhering waterproof membrane installed under shingles to block water from ice dams.
Also called ice and water barrier or ice and water membrane, it is a rubberized asphalt product that adheres directly to the roof deck before any other underlayment or shingle goes on.
It creates a flexible, waterproof layer that works even when water is forced to sit against it under pressure. The self-sealing quality around nails is one of its most important features.
It is different from standard felt underlayment, which is not designed to handle pooled water or prolonged moisture exposure, making roofing ice shield the right choice specifically for eaves and vulnerable zones.
Where do you install an ice and water shield on a roof?
Along eaves, in valleys, around penetrations, and on low-slope areas.
The primary installation zones are the eave edges, where it must extend past the interior wall line by at least 900 millimetres per Canadian code. It also goes in every roof valley, along rake edges in wind-prone areas, and around any roof penetration such as a chimney, skylight, or vent stack.
On low-slope roofs with a pitch below 4:12, the membrane typically covers the entire deck surface. Getting placement right is as important as using the right product, so working with an experienced roofing contractor ensures every required area is covered before the shingles go on.