A roof anchor is a safety device permanently or temporarily fixed to a rooftop structure that provides a secure attachment point for fall protection systems. Whether you are performing routine maintenance, replacing shingles, or completing a full installation, having a properly installed roof anchor between you and a potential fall is not optional — it is essential.
Roof anchors come in several types, each suited for different roofing materials, pitches, and load requirements. Installing one correctly means selecting the right anchor for your roof type, locating a structural rafter or truss to fasten into, and following load-rated specifications that meet Canadian safety standards. A poorly placed or incorrectly installed anchor can fail under sudden force, which defeats the entire purpose of having one. This article covers how roof anchors work, the different types available, step-by-step installation guidance, what professionals look for, and answers to the most common questions homeowners and contractors ask before starting any elevated rooftop work.
Why a Roof Anchor Matters More Than Most Homeowners Realize
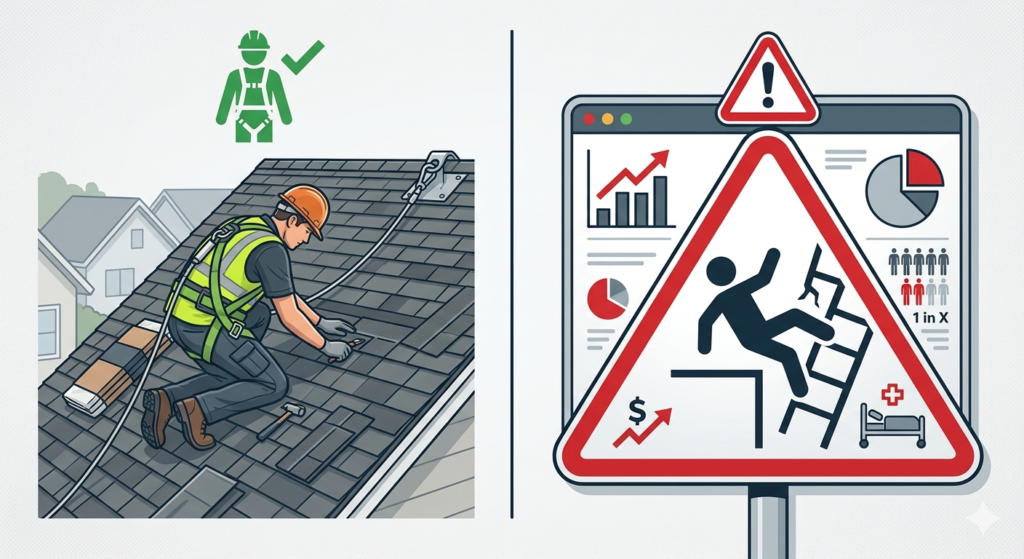
Falls from rooftops remain one of the leading causes of serious injury in residential and commercial construction across Canada. Even a modest single-storey roofline sits high enough above grade to cause severe harm during an uncontrolled fall, and steeper pitches on two-storey homes amplify that risk considerably. A roof anchor addresses this directly by giving workers a fixed, load-tested connection point from which a harness lanyard or self-retracting lifeline can be clipped and tensioned before anyone steps onto the surface.
Beyond the safety benefit, roof anchors are increasingly required under provincial occupational health and safety regulations for any rooftop work that exceeds a certain height threshold. In Manitoba and across most of Canada, any work at heights of three metres or more requires fall protection equipment, and a properly rated roof anchor is the foundation of that system. Ignoring this requirement does not just put workers at risk — it can also expose property owners to liability if an unprotected worker is injured on their site. Understanding what a roof anchor does and how it should be installed is practical knowledge for anyone who owns, maintains, or works on a residential or commercial building.
The Different Types of Roof Anchors and Which One Fits Your Roof
Not every roof anchor is built the same way, and choosing the wrong type for your specific roofing system can compromise the integrity of the attachment point entirely. The selection process begins with understanding your roof pitch, material, and the frequency with which the anchor will be used.
Permanent Roof Anchors
Permanent roof anchors are designed to stay in place season after season and are commonly found on commercial buildings, multi-unit residentials, and any property where rooftop access is required on a recurring basis. These anchors are bolted directly through the roofing material and decking into a structural rafter or truss below, creating a connection that is tested to withstand the sudden dynamic load of a fall arrest. They typically include a hinged or pivoting ring that lies flat when not in use, reducing the risk of tripping or creating a leak point. Because they are left exposed to the elements year-round, they are manufactured from galvanized steel or stainless steel to resist corrosion through freeze-thaw cycles and wet Canadian winters.
Temporary or Portable Roof Anchors
Temporary roof anchors are intended for single-job use or for properties where a permanent fixture is not practical. These devices clamp or hook over the ridge cap of a peaked roof and rely on counterweight or friction to hold their position. While they are quicker to deploy, they carry important limitations — they are generally rated for lower loads than permanent anchors, they can shift on certain roofing materials, and they should never be used as a substitute for a properly installed permanent anchor on high-frequency work sites.
Truss or Rafter Strap Anchors
This style of anchor wraps around a structural rafter or truss member inside the attic space and connects to an external ring that protrudes through the decking. Because the attachment point is the structural framing member itself rather than just the decking or sheathing, these anchors tend to have very high load ratings and are favored on steep-pitch residential roofs where drilling through finished surface material needs to be minimized.
| Anchor Type | Best Application | Load Rating Range | Reusability |
| Permanent Bolt-Down | Commercial, frequent access | 5,000 lbs+ | High |
| Ridge Hook (Temporary) | Residential, single jobs | 310 lbs typical | Limited |
| Truss/Rafter Strap | Steep-pitch residential | 5,000 lbs+ | High |
How a Roof Anchor Is Installed Step by Step
Installing a roof anchor properly is not a job that rewards guesswork. Each step in the process has a specific purpose, and skipping any of them can reduce the anchor’s rated holding capacity or create a water infiltration point that leads to rot and structural damage over time. Here is how a standard permanent bolt-down roof anchor is installed on a sloped residential roof.
Step 1: Locate a Structural Rafter
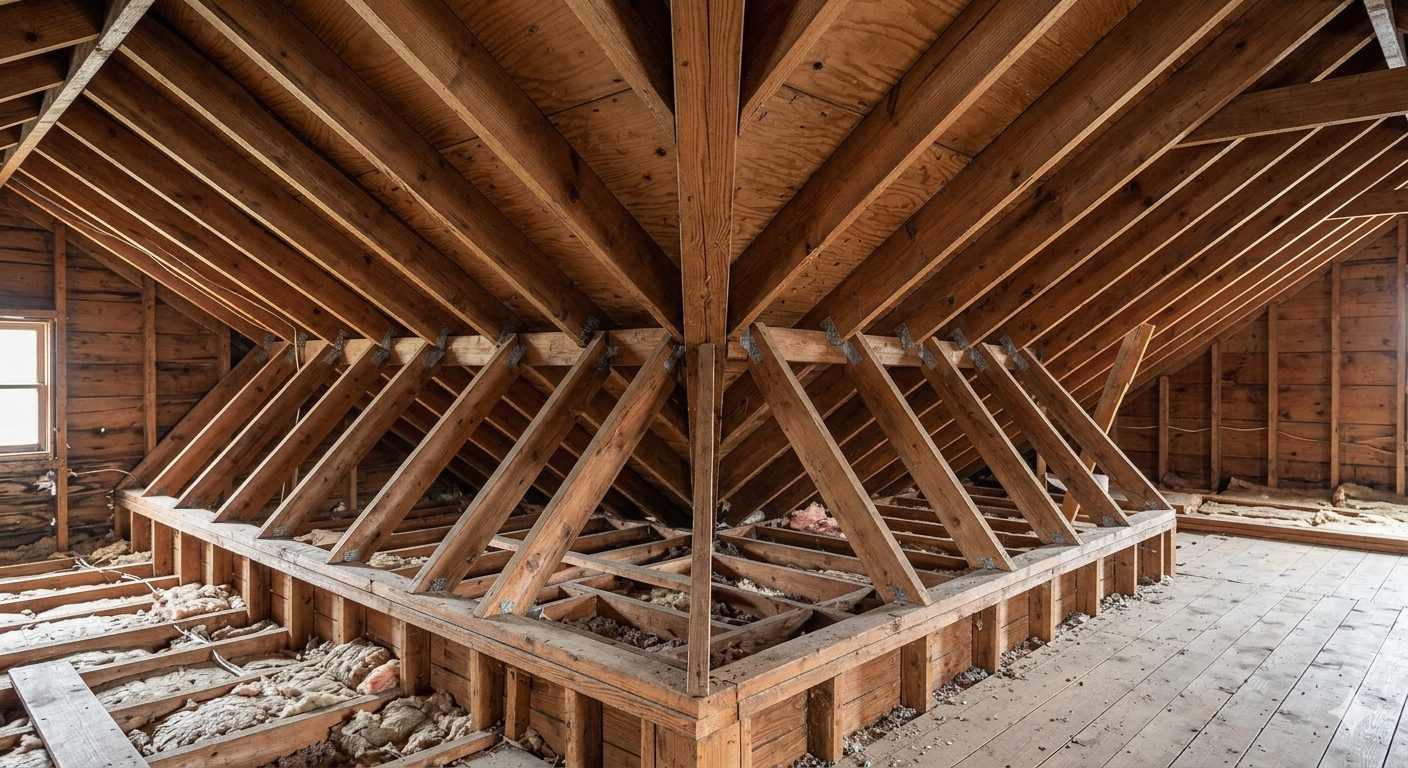
Before touching the roofing surface, you need to identify the exact location of a rafter or truss below the decking. Using a stud finder from inside the attic or measuring from a known reference point, mark the rafter’s centre line on the decking. The anchor must fasten into solid framing — never into decking alone, as sheathing panels do not have sufficient shear or withdrawal strength to hold under fall arrest loads.
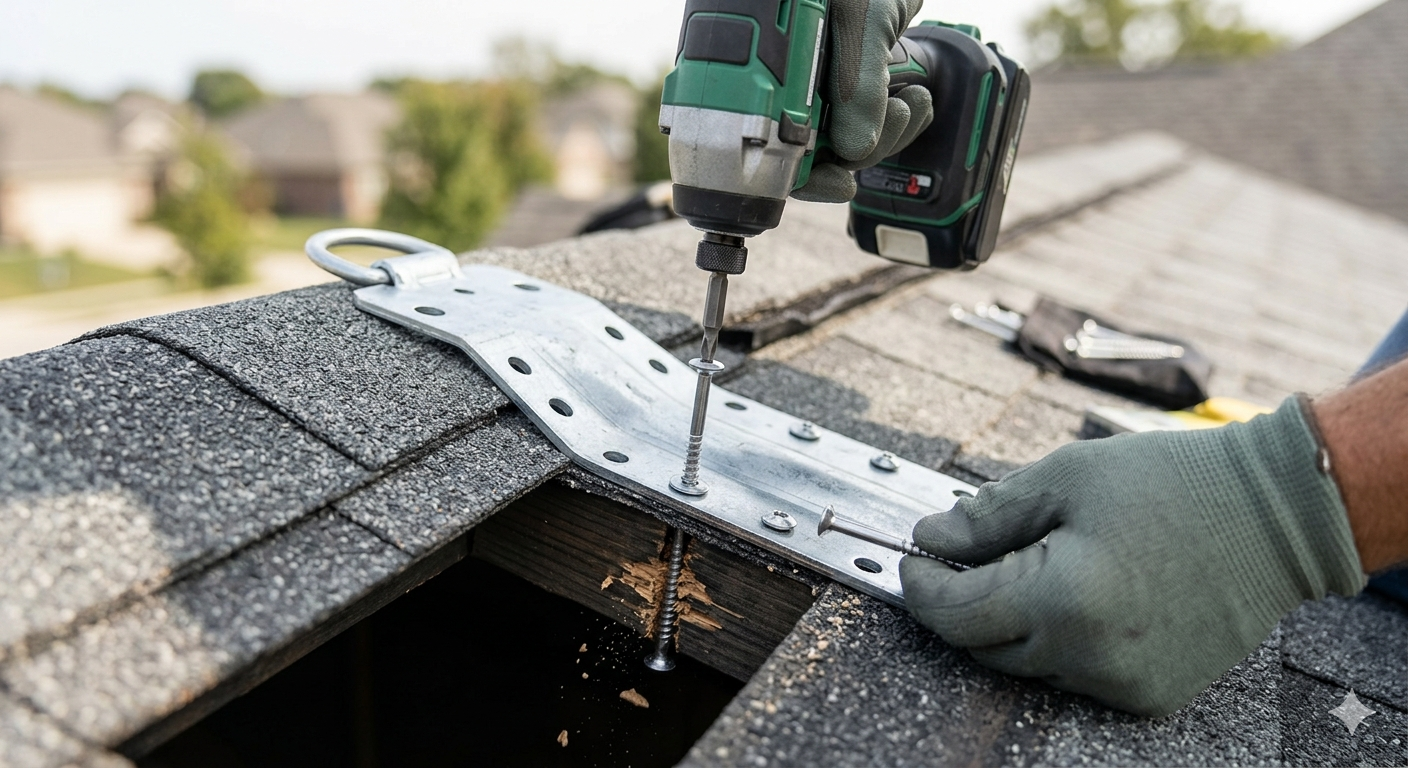
Step 2: Position the Anchor Plate
Place the anchor base plate over your marked rafter location on the exterior roof surface. The plate should sit flat against the roofing material with the attachment ring centred over the rafter. On shingle roofs, this typically means lifting the lower edge of the overlapping shingle course above the anchor so the top flange can slide underneath and be sealed properly after fastening.
Step 3: Fasten With Structural Fasteners
Drive the specified lag screws or through-bolts into the rafter below. Most manufacturers specify the fastener diameter, length, and number of fasteners required to achieve the rated load capacity — follow these specifications exactly, as using shorter or fewer fasteners than specified will reduce the anchor’s performance rating. Fasteners should be torqued to the recommended specification and checked for full seating against the base plate.
Step 4: Seal Against Water Infiltration
Any penetration through a roofing surface is a potential leak point. After fastening the anchor, apply a compatible roofing sealant around the base plate perimeter and under any lifted shingle flanges before pressing them back into position. On flat or low-slope roofs, additional membrane patching may be required around the anchor base to maintain the waterproof layer.
Step 5: Test Before Use
Once installed, the anchor should be visually inspected for proper seating and checked against the manufacturer’s inspection criteria before any worker attaches a lifeline to it. On commercial sites, load testing by a qualified person may also be required under site safety plans.
Things To Know Before Installing a Roof Anchor
There are several practical realities about roof anchor installation that do not always appear in the basic how-to instructions but make a significant difference in how well the system performs over its service life.
Roof pitch affects anchor selection. Anchors designed for low-slope roofs are not always appropriate for steep-pitch installations. As the pitch increases, the angular load on the fasteners changes, and anchors with swivel or pivoting rings are better suited to steep applications because they allow the attachment ring to orient toward the worker regardless of position.
Decking condition matters. If the sheathing below the anchor location is soft, delaminated, or water-damaged, the fasteners will not develop their rated holding strength even if they appear tight. Probing the decking around the intended location before installation can prevent a dangerous false sense of security.
Anchor placement affects fall clearance. A roof anchor installed too close to a roof edge reduces the usable working radius and may not provide enough clearance below the eave for the full deceleration distance of a self-retracting lifeline. Anchors should generally be installed near the ridge to maximize the working zone and fall clearance distance.
Inspect annually. Roof anchors exposed to Manitoba winters experience significant thermal cycling, UV degradation, and freeze-thaw movement. Inspecting the anchor base, fasteners, and ring mechanism every season before use is a straightforward maintenance step that extends service life and catches developing problems before they become failures.
Sealant needs periodic renewal. The roofing sealant around the anchor base will eventually crack or separate, particularly through extreme temperature swings. Reapplying sealant as part of an annual roof inspection prevents water from tracking along the fastener shanks into the decking and framing below.

How Roof Anchors Connect to a Complete Fall Protection System
A roof anchor on its own is only one component of a fall protection system, and understanding how all the pieces work together helps clarify why proper anchor installation is so important. The anchor serves as the fixed point, but the system also includes a full-body harness worn by the worker, a connecting lanyard or self-retracting lifeline that runs from the harness to the anchor, and in some cases a horizontal lifeline that allows movement across the roof while staying connected to a single anchor point.
The load rating of the anchor must meet or exceed the maximum arrest force that can be generated by the entire system during a fall. That force is not simply the worker’s body weight — it is the dynamic load produced when a falling person is suddenly decelerated, which can be several times the static body weight depending on the type of connector used and the fall distance before arrest. This is why roof anchors are rated to 5,000 pounds or more even though individual workers weigh far less. The safety margin accounts for the physics of fall arrest, not just static body weight.
For residential maintenance tasks in Winnipeg where residential roof installations are involved, having an anchor system already in place simplifies the process for any contractor or inspector who accesses the roof in the future. Similarly, properties that have undergone shingle roof replacement work are ideal candidates for anchor installation at the same time, since the decking and framing are already accessible and visible.
| Fall Protection Component | Function | Connected To |
| Roof Anchor | Fixed attachment point | Structural rafter/truss |
| Full-Body Harness | Distributes arrest force across body | Worker |
| Lanyard / SRL | Connects harness to anchor, limits fall distance | Anchor ring + harness dorsal D-ring |
| Horizontal Lifeline | Allows lateral movement between two anchors | Two anchor points |
When to Call a Professional for Roof Anchor Installation
While experienced DIYers can install a roof anchor following manufacturer instructions and applicable safety standards, there are situations where hiring a licensed roofing contractor is clearly the better choice. If your roof is older and the decking condition is unknown, if your structure has unusual framing, or if you need multiple anchors placed according to a site safety plan, professional installation ensures that the system meets regulatory requirements and performs as rated.
Zega Roofing has been serving Winnipeg homeowners and commercial property owners for over 25 years, and their team understands the specific demands that Manitoba’s climate places on rooftop systems — including fall protection anchor points. For pricing on roof anchor installation or to discuss what type of anchor is appropriate for your property, contact Zega Roofing directly for an accurate assessment.
Properties requiring ongoing rooftop maintenance can also benefit from reviewing roofing edge flashing work alongside anchor installation, since both involve penetrations and perimeter detailing that are best handled together.
Protecting Your Roof and Every Roof Anchor On It
A roof anchor is a straightforward piece of hardware with an outsized impact on safety. Understanding how it works, why placement and fastening into structural framing matter, and what makes one type of roof anchor more appropriate than another for a given roof allows you to make informed decisions whether you are a homeowner planning routine maintenance or a contractor setting up a site safety system.
Every roof anchor installation is ultimately about one thing: making sure that anyone who steps onto that roof has a reliable connection point that will hold if the unexpected happens. Getting that installation right from the start — with the correct anchor type, correct fastener specification, and proper sealant — is the foundation of responsible rooftop safety in Winnipeg and across Canada.
Frequently Asked Questions About Roof Anchors
How do you install a roof anchor?
Locate a structural rafter, position the anchor base plate over it, fasten with manufacturer-specified lag screws, seal around the base to prevent leaks, and inspect before use.
Do all roofs have a roof anchor?
No. Most residential roofs in Canada do not come with a pre-installed roof anchor unless one was added during construction or a previous renovation.
Do roof anchors damage the roof?
When installed correctly with proper sealant, a roof anchor does not damage the roof and creates a weatherproof penetration that lasts for years.
How to install an anchor properly?
Follow the manufacturer’s load specifications, fasten into structural framing only, seal all penetrations, and inspect annually.
What is the best ceiling anchor?
For rooftop fall protection in residential settings, a permanent bolt-down anchor fastened into a structural rafter is generally considered the most reliable option.