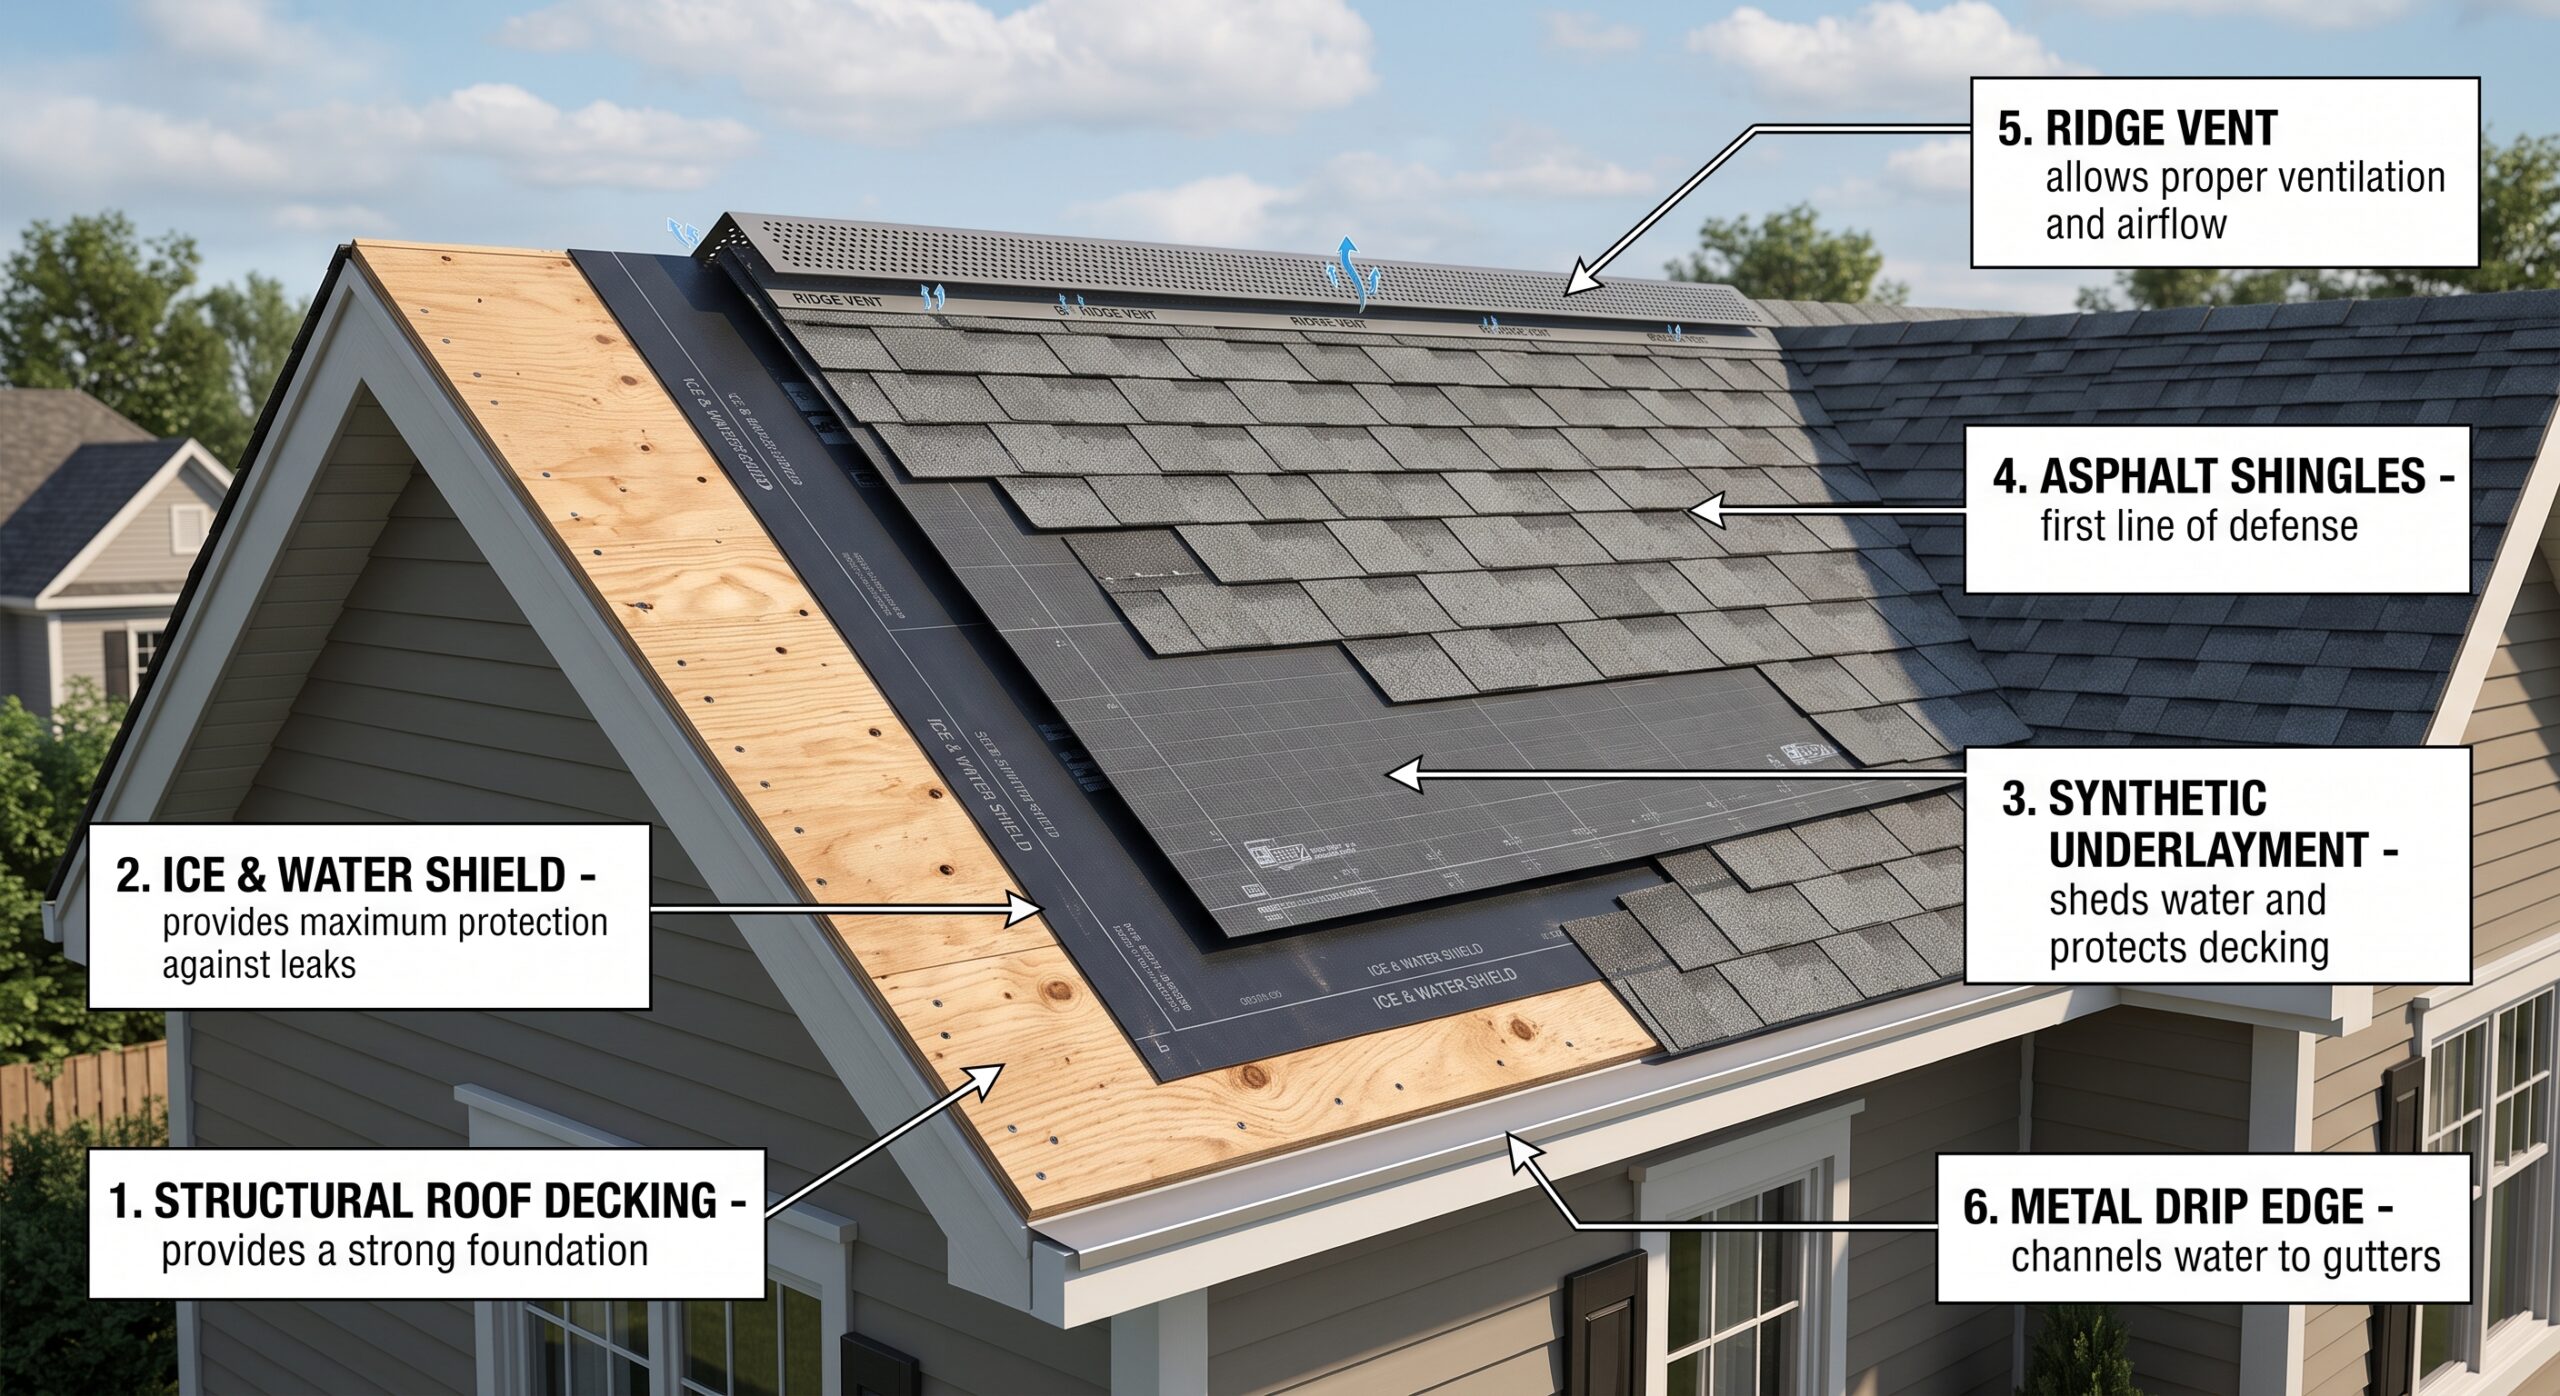
Roofing layers are the stack of materials, decking, underlayment, ice and water protection, shingles or panels, flashing, and ventilation, that all work together to keep water out and your home standing strong through winter.
Most Winnipeg homes need at least five of these layers, and skipping even one can lead to leaks, ice damming, or a roof that just doesn’t last as long as it should.
So this piece walks through what each layer does, why Manitoba weather makes them so important, how they work together as one system, and which combination actually makes sense for your house.
We’ll also go over warning signs that your roofing layers are wearing out and answer the questions people ask most when they start looking into roof construction here.
What Roofing Layers Actually Are
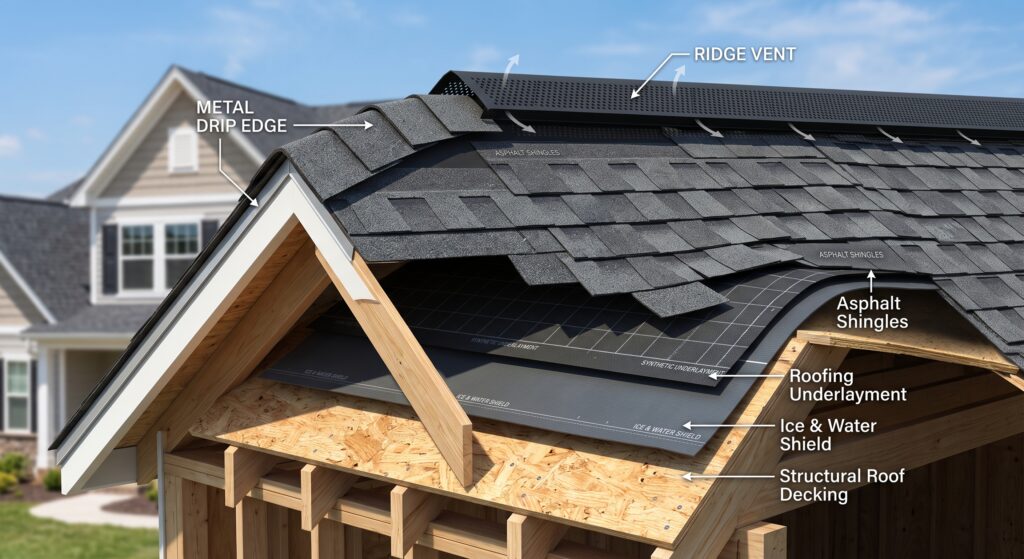
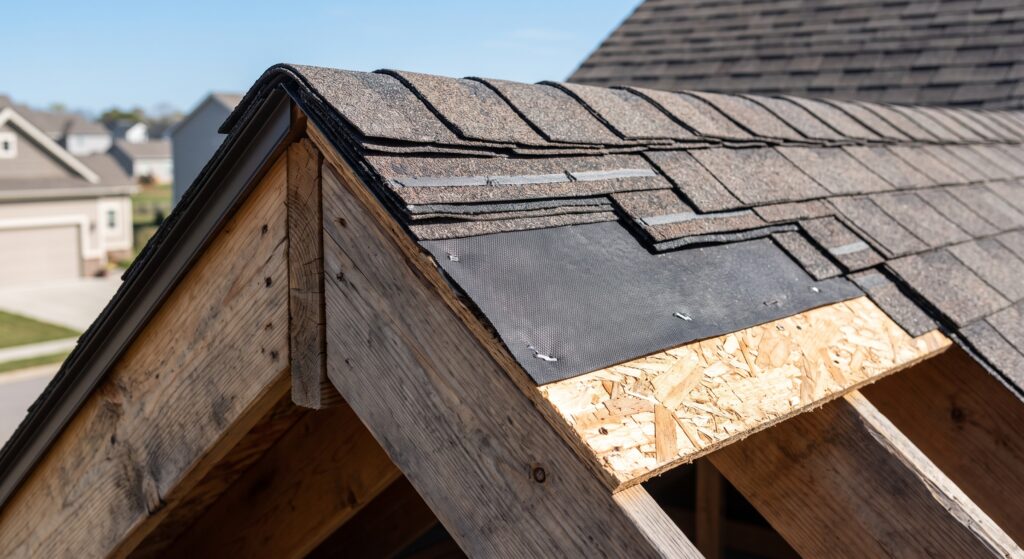
A roof isn’t one single thing sitting on top of your house. It’s a system, and roofing layers is just the term for all the pieces stacked together to make that system work. At the bottom you’ve got the decking, usually plywood or OSB, which is the structural base everything else sits on.
Above that comes an underlayment, then in cold climates like ours, an ice and water shield gets added along the eaves and valleys. Then you’ve got the actual visible material, shingles, metal panels, or tile, and finally flashing around chimneys, vents, and edges to seal the gaps.
Each layer has a job. Miss one and water finds a way in, usually right where you least expect it. That’s why roofing layers matter so much more than people think when they’re just picturing shingles on a roof.
Why Roofing Layers Matter So Much in Winnipeg
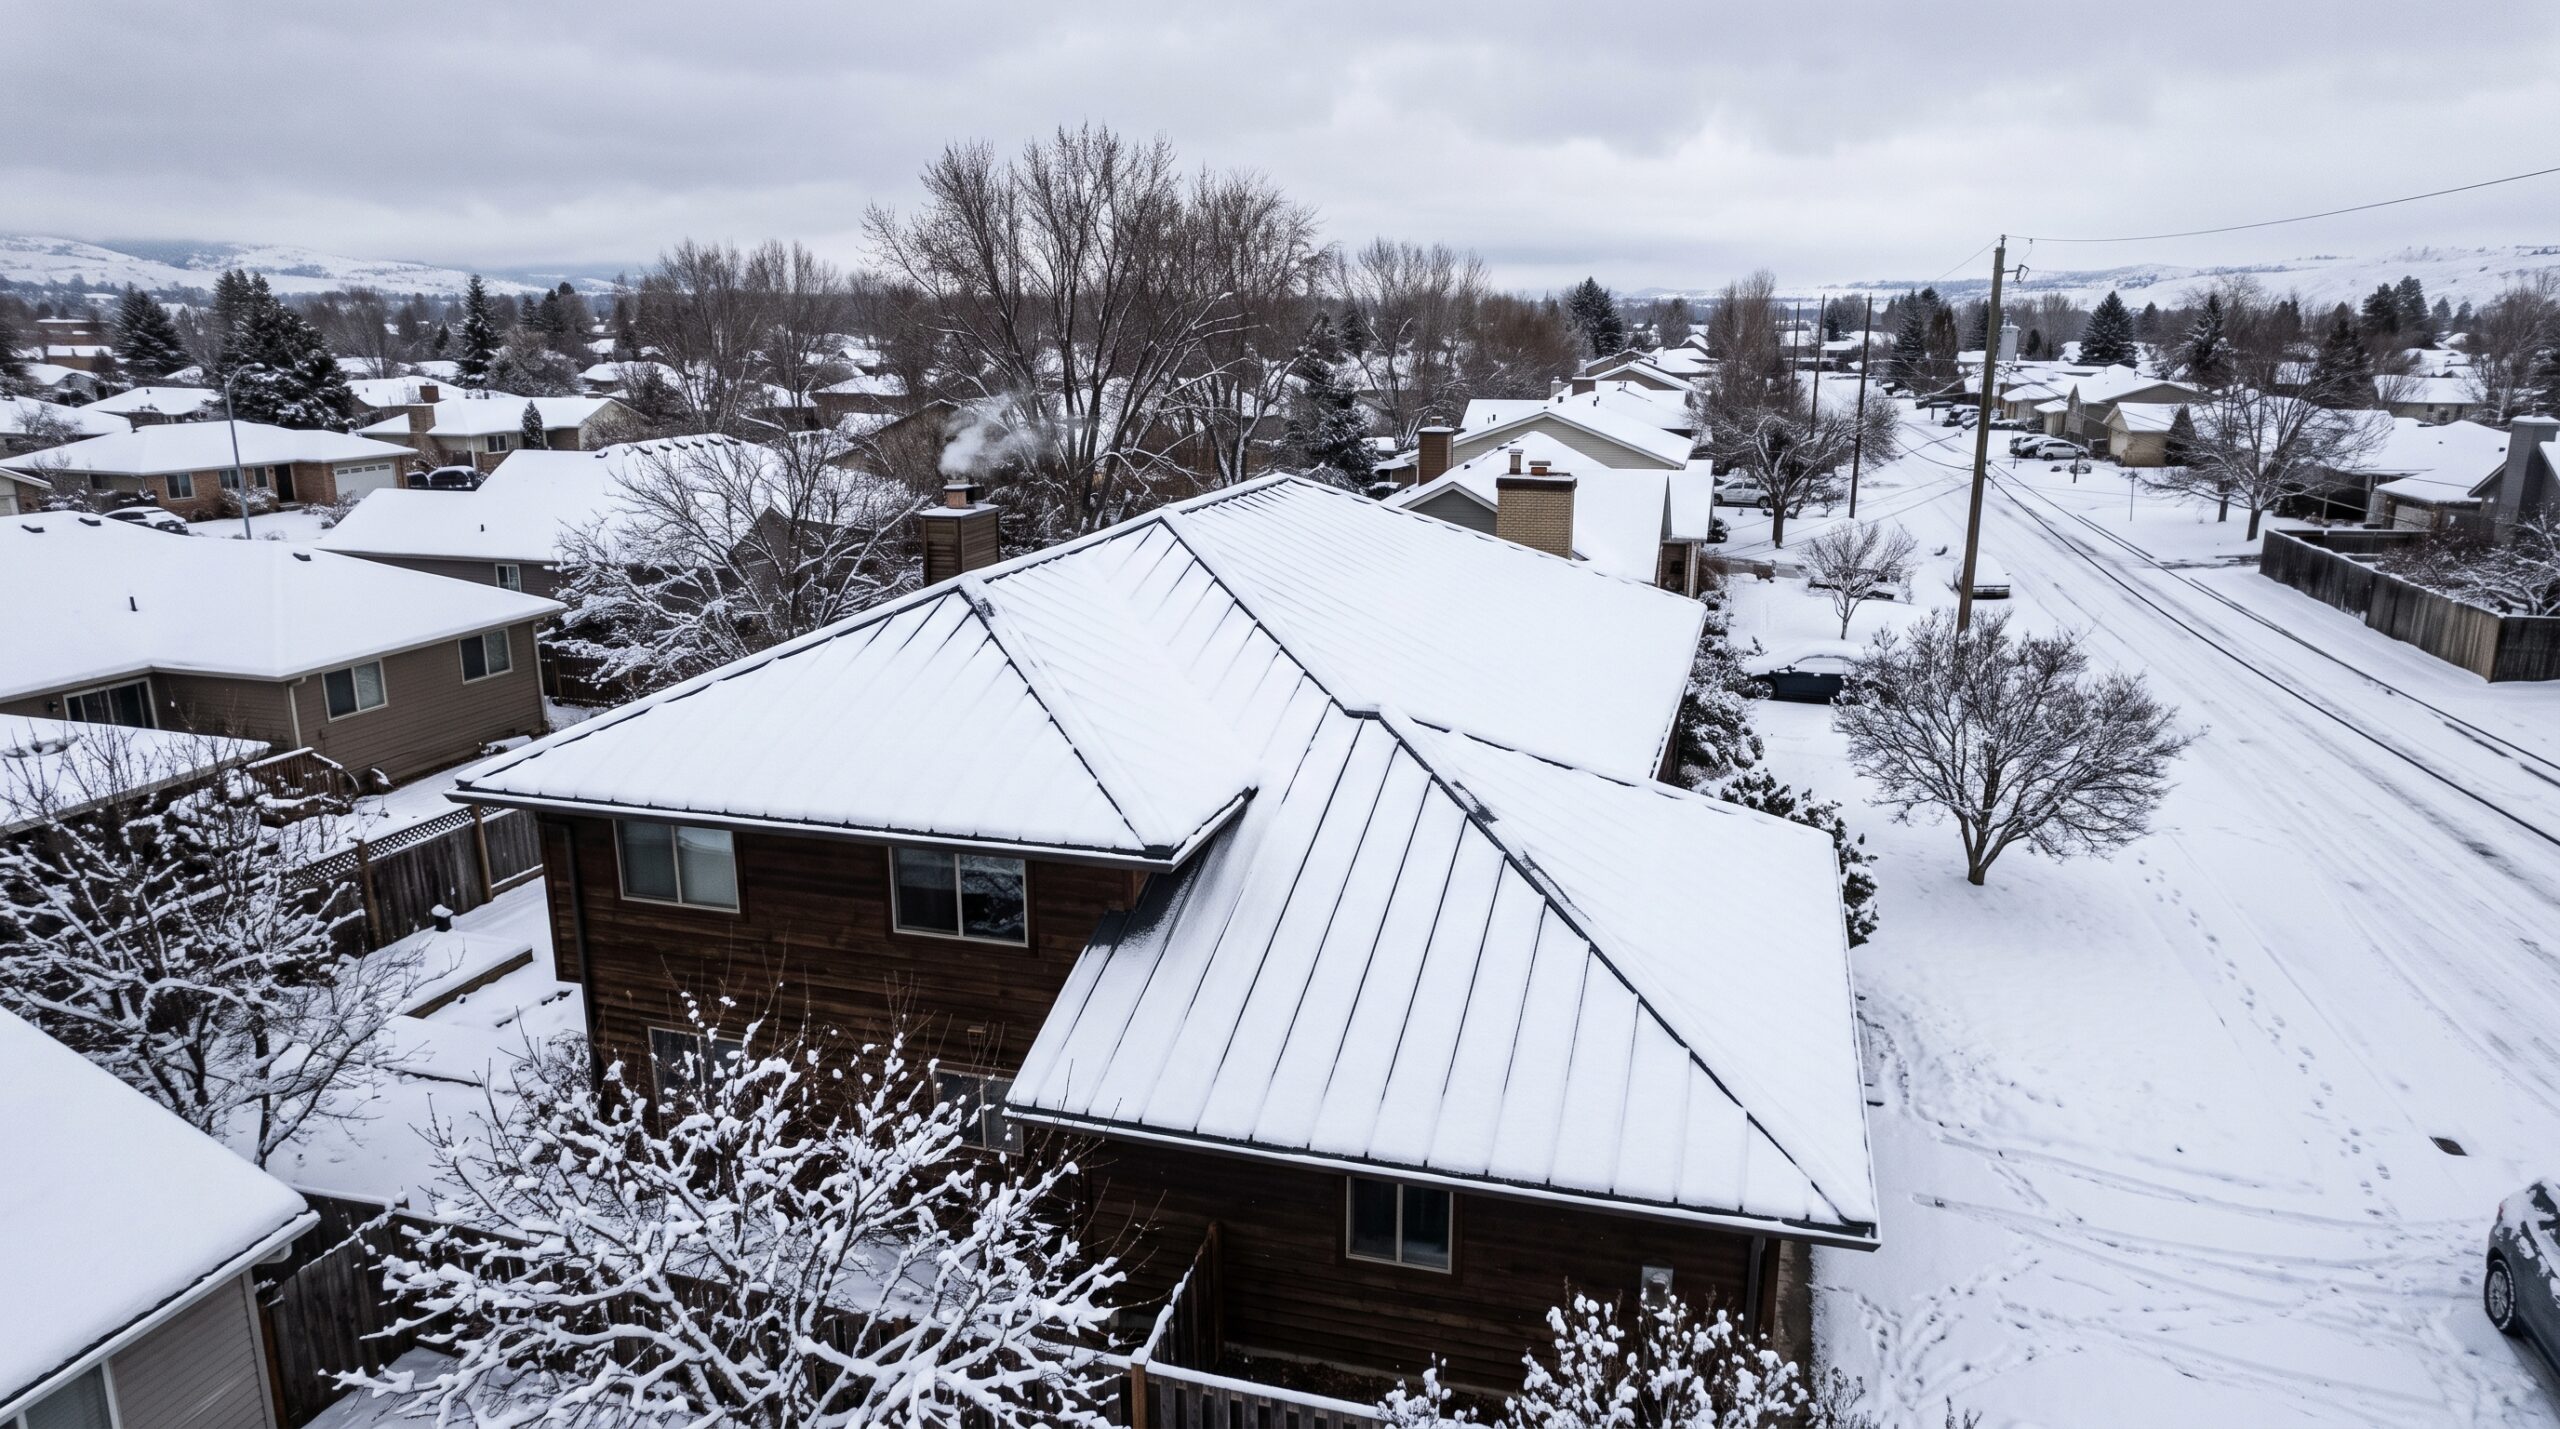
Winnipeg doesn’t do mild weather. We get deep freezes, heavy snow loads, and then those sudden thaws that turn everything to slush before it refreezes overnight. That freeze-thaw cycle is brutal on a roof that isn’t built with the right roofing layers in place.
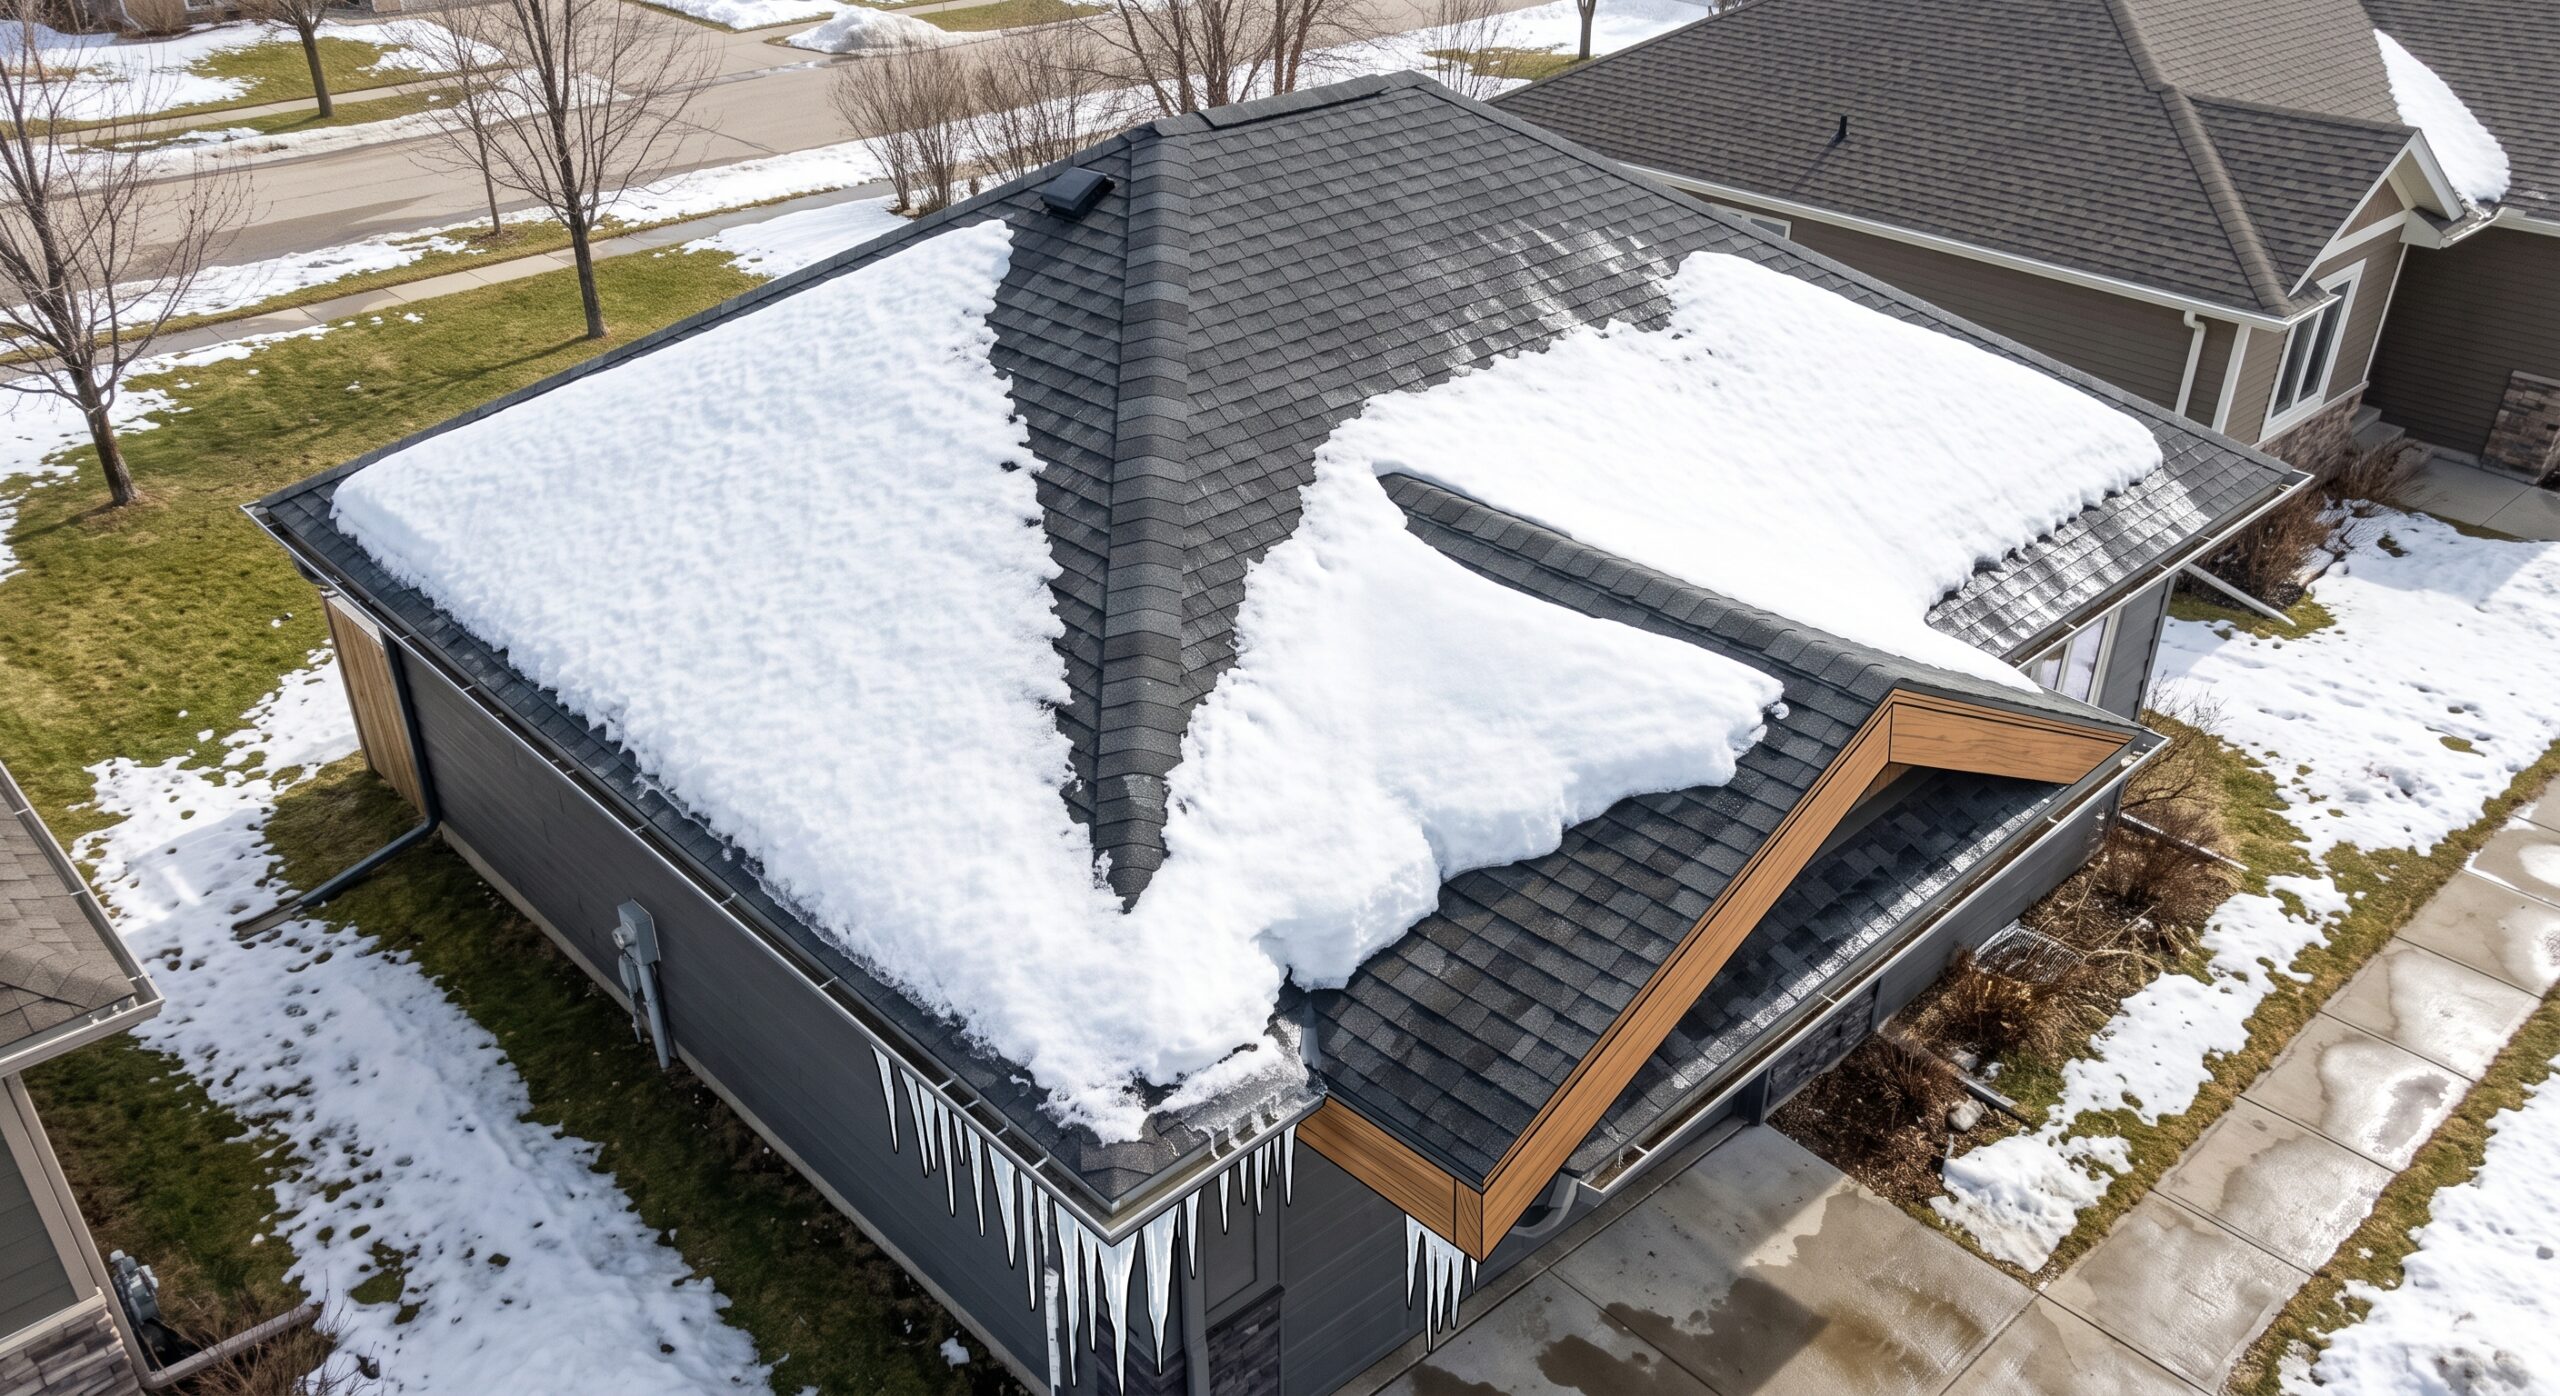
Ice damming is probably the biggest local issue. Heat escapes from the attic, melts snow on the roof, that water runs down and refreezes at the colder eaves, and then it backs up under the shingles.
Without a proper ice and water shield layer along those eaves, that meltwater gets right into your decking. Wind is another factor. Winnipeg gets some serious gusts, especially in spring and fall, and a roof with weak flashing or poorly sealed shingle layers can lose material fast.
Homes across Charleswood, River Heights, and the surrounding areas all deal with the same climate pressures, so the layering approach doesn’t really change much by neighborhood. It changes more by roof age, slope, and how the attic is ventilated.
How Roofing Layers Work Together
None of these roofing layers work in isolation. The decking holds everything up, but it’s not waterproof on its own. The underlayment adds a secondary barrier. The ice and water shield handles the trouble spots.
The top layer, whatever material you pick, sheds the bulk of rain and snow. And ventilation keeps moisture from building up underneath all of it. Take one piece out and the whole system gets weaker, even if it doesn’t look like a problem right away.
The Layers From Bottom to Top
- Roof deck – plywood or OSB board that forms the structural surface
- Underlayment – a water-resistant barrier laid over the deck
- Ice and water shield – extra protection at eaves, valleys, and around penetrations
- Primary roofing material – shingles, metal panels, or another finish layer
- Flashing – metal strips sealing joints around chimneys, skylights, and walls
- Ventilation components – ridge vents, soffit vents, or similar airflow paths
Here’s a quick table showing what each layer actually does and why it matters here specifically.
| Layer | Main Function | Why It Matters in Winnipeg |
| Roof deck | Structural base for the whole system | Needs to stay dry and rigid under heavy snow loads |
| Underlayment | Secondary water barrier | Backs up the shingles when wind drives rain sideways |
| Ice and water shield | Blocks meltwater at vulnerable spots | Directly fights ice damming at eaves and valleys |
| Shingles or panels | Primary weather barrier | Sheds snow and rain, takes the brunt of wind |
| Flashing | Seals joints and transitions | Prevents leaks around chimneys and vent pipes |
| Ventilation | Regulates attic temperature and moisture | Reduces ice damming and extends material life |
Which Roofing Layers Option Is Best for Your Home
This is where it gets specific, because the right combination of roofing layers depends on a few things: your roof’s slope, how old the current system is, and what kind of top material you’re going with.
Why it matters: a low-slope roof holds snow longer, so it needs more robust ice and water shield coverage than a steep roof where snow slides off fast.
How it works: contractors measure the pitch, check attic ventilation, and figure out how far up the eaves that ice shield layer needs to extend, sometimes it’s just a few feet, sometimes it needs to go much further depending on the overhang.
Which option is best really comes down to matching the layer combination to your specific roof rather than using a one-size-fits-all approach. A steep asphalt shingle roof and a low-slope metal roof need different layering strategies even on houses right next to each other.
Older homes built decades ago often have thinner or outdated roofing layers compared to what’s standard now, so a full tear-off and rebuild sometimes makes more sense than trying to patch what’s there. Newer builds usually already have decent layering, so repairs might just mean fixing flashing or refreshing the top material.
| Roof System Type | Typical Layers Included | Best Suited For |
| Standard asphalt shingle system | Deck, underlayment, partial ice shield, shingles, flashing | Most residential homes with moderate to steep slopes |
| Metal panel system | Deck, high-temp underlayment, full ice shield, metal panels, flashing | Steep roofs, homes wanting longer material lifespan |
| Low-slope membrane system | Deck, extended ice and water shield, membrane, flashing | Additions, garages, or flat-adjacent roof sections |
Things To Know
- Roofing layers aren’t optional extras, each one addresses a specific failure point
- Ice and water shield coverage requirements often depend on your roof’s slope and overhang length
- Ventilation is part of the layering system even though it’s not a physical barrier
- Skipping underlayment to save time is one of the most common corner-cutting mistakes
- A roof’s total lifespan depends more on how well the layers were installed than on the shingle brand chosen
- Flashing failures cause a disproportionate share of leak calls compared to shingle wear
Signs Your Roofing Layers Might Be Failing
Not every roof problem is obvious from the ground. Stains on your ceiling, especially after a thaw, usually mean water has already gotten past the top layer and maybe the underlayment too. Ice buildup that forms thick ridges along your eaves every winter is a pretty strong sign your ice and water shield either isn’t doing enough or your attic ventilation needs attention.
Granule loss in your gutters, curling shingle edges, or daylight visible through the attic boards are all signs the outer roofing layers are aging out. And if your energy bills keep climbing in winter without an obvious reason, poor insulation or ventilation within the roofing layers system could be part of it.
If you’re noticing any of this, it’s worth getting eyes on it before a small gap turns into a bigger repair. You can check out examples of completed roof layer installations in our gallery to get a sense of what a properly layered roof actually looks like finished.
For homes dealing with recurring ice buildup specifically, pairing a roofing layers ice shield upgrade with better attic airflow tends to solve the problem at the source rather than just patching symptoms every spring. And if your shingles are already curling or bald in spots, a roofing layers refresh through shingle replacement usually addresses both the look and the function at once. For flatter sections like additions or garage roofs, a roofing layers membrane upgrade handles water pooling better than standard shingles ever could.
Wrapping It Up
At the end of the day, roofing layers are what separate a roof that lasts decades from one that starts causing problems within a few years. Getting the combination right for your specific home, slope, and climate exposure matters more than any single material choice.
Zega Roofing has spent years working through Winnipeg’s freeze-thaw cycles and knows exactly which layer combinations hold up best against local conditions.
If you’ve got questions about your roof’s current layers or you’re noticing signs of wear, reach out to our team or give us a call at +1 204-997-2697. We’re happy to take a look and walk you through what your roof actually needs.
Frequently Asked Questions
How many roofing layers does a typical roof need?
Most residential roofs need five to six layers: deck, underlayment, ice and water shield, primary material, flashing, and ventilation. Fewer layers usually means more vulnerability to leaks and ice damage over time.
Can you add new roofing layers over old ones?
Sometimes, but it’s not always recommended. Layering new shingles over old ones can trap moisture and shorten the lifespan of both, so a full tear-off is often the safer long-term choice.
Do all roofing layers need to be replaced at the same time?
Not necessarily. Flashing or the top material can sometimes be repaired individually, but if the deck or underlayment is compromised, a broader replacement usually makes more sense.
How long do roofing layers typically last?
It varies by material, but a well-installed system often lasts 20 to 30 years. Poor installation or skipped layers can cut that lifespan significantly shorter.
What happens if a roof is missing the ice and water shield layer?
Meltwater can back up under the shingles and soak the decking below. This is one of the most common causes of winter roof leaks in colder regions like Manitoba.