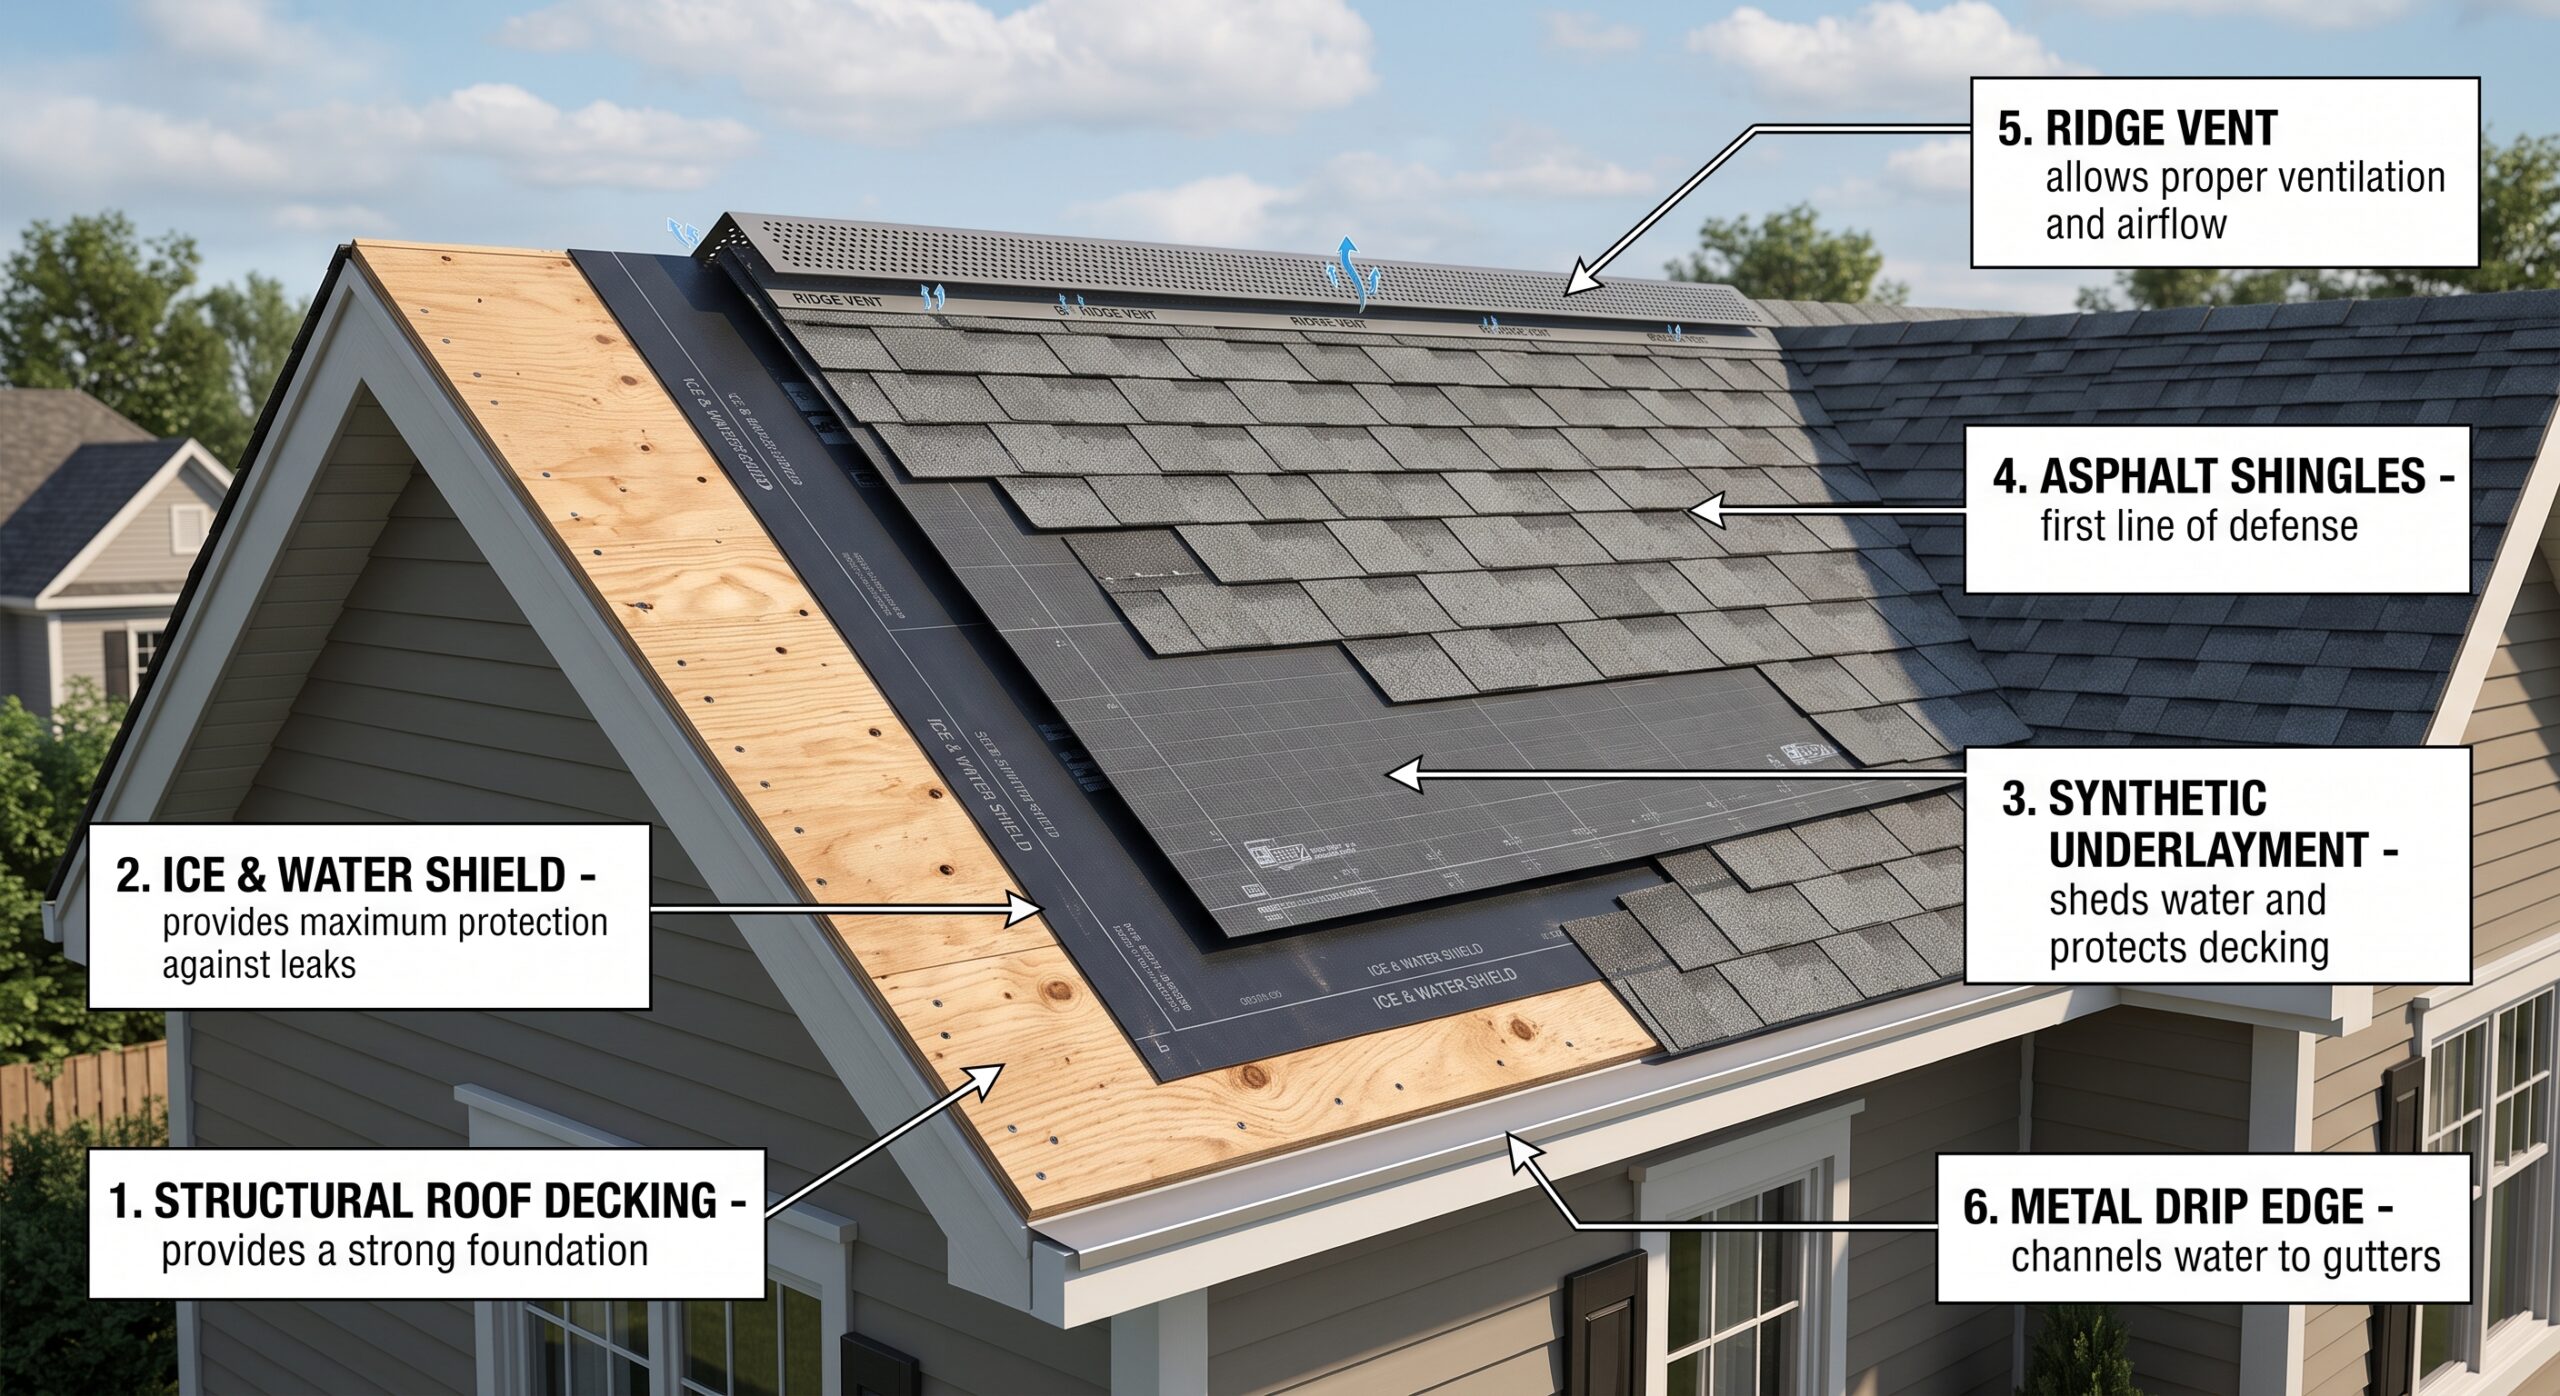
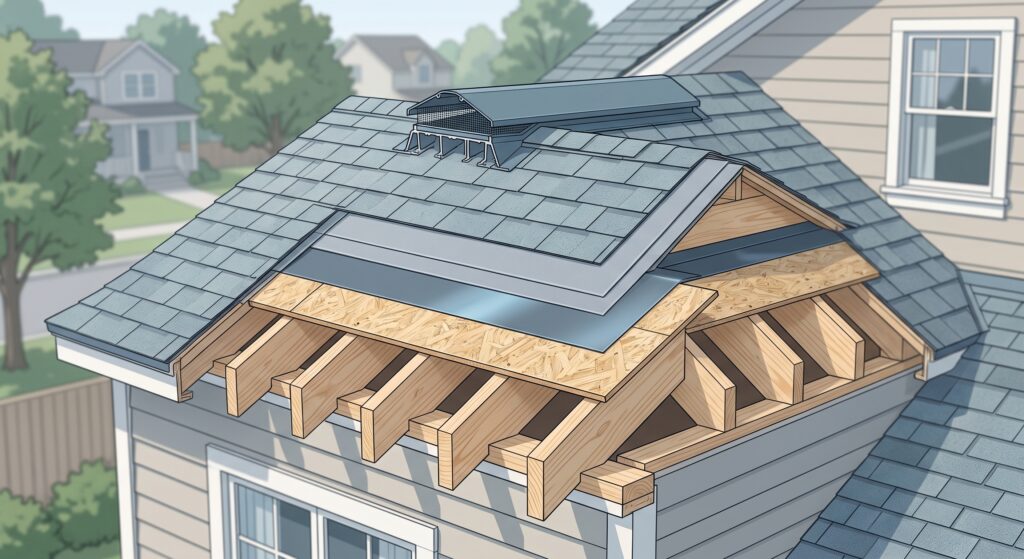
A roofing diagram is a labelled drawing that shows every layer and part of a roof, from the rafters to the ridge cap.
The best roofing diagram for most Winnipeg homes is the cross-section view, because it shows how the deck, underlayment, ice barrier, shingles, and vents stack together. Plan and elevation drawings help with measuring and pitch, while exploded views suit a full replacement.
Reading one takes only a few steps, and knowing the parts helps you spot leaks, ice dams, and poor ventilation early. Winnipeg’s freeze-thaw swings, heavy snow, and prairie winds make every layer count.
Which Roofing Diagram Is Best for a Winnipeg Home?
For most houses, the cross-section view wins. It slices the roof like a layered cake, so you can see the rafters, sheathing, underlayment, ice barrier, shingles, and vents in the order they are installed. Homeowners can follow it without any training, and contractors use it to confirm details before work begins.
Plan and elevation views still have a place. A plan view looks straight down and shows slopes, valleys, and ridges, which helps with measuring. An elevation view looks from the side and shows pitch and overhang.
Neither one shows what happens inside the roof, and that hidden space is where many Winnipeg problems start, such as trapped moisture and ice damming at the eaves.
The Four Common Diagram Styles
Cross-Section View
- Shows every layer from rafter to shingle
- Best for homeowners, inspections, and leak tracing
- Reveals ventilation paths and insulation depth
Exploded Layer View
- Separates each layer so nothing hides behind another
- Best for full replacements and quote comparisons
- Makes installation order easy to follow
Plan View
- Looks straight down at the whole roof surface
- Best for measuring, drainage planning, and large flat roofs
- Shows valleys, ridges, and roof-to-wall joints
Elevation View
- Looks at the roof from the side
- Best for pitch, overhang, and permit paperwork
- Shows how the roofline sits against the walls
| Diagram Type | What It Shows | Best Use | Winnipeg Value |
| Cross-section | All layers in order | Leak tracing and inspections | Reveals ice dam and venting problems |
| Exploded layer | Each layer separated | Full replacements | Confirms nothing was skipped in a quote |
| Plan | Roof shape from above | Measuring and drainage | Helps place drains on low-slope roofs |
| Elevation | Pitch and overhang | Permits and planning | Shows how snow will slide or stack |
Why a Roofing Diagram Matters Before Any Work Begins
A roofing diagram turns a hidden structure into something you can point at. Without one, a repair quote can sound like a list of unfamiliar words. With one, you can see where the ice barrier should sit, where the flashing tucks under the siding, and where air should move through the attic.
Take a typical home in St. James. The owner notices a brown stain on a bedroom ceiling near an outside wall. On a cross-section drawing, the stain lines up with the eave, where the ice barrier ends and the gutter begins.
That points to ice damming rather than worn shingles, and the fix changes completely. Crews working across all the areas we served use drawings like this to explain the cause before touching a single shingle.
Diagrams also protect budgets and timelines. They help you compare quotes line by line, confirm that each layer is included, and prevent skipped steps such as missing edge metal or weak ventilation. For insurance claims, a marked-up drawing paired with dated photos gives a clear record of what was damaged and where.
How to Read a Roofing Diagram in Five Simple Steps
Most drawings follow the same logic, so once you learn one, you can read them all. Work through these five steps in order.
- Find the legend. It explains the lines, shading patterns, and short labels.
- Locate the structure at the bottom, meaning the rafters or trusses and the deck above them.
- Trace each layer upward and check the order. Water barriers belong under the outer covering, never above it.
- Study the edges. Eaves, rakes, and valleys need metal flashing and drip edge, and the drawing should show where each piece overlaps the next.
- Follow the air path. Intake vents at the soffit and exhaust vents near the ridge should connect through a clear channel above the insulation.
Winnipeg Details Worth Circling
- An ice barrier that extends well up the slope from the eave
- Insulation that stops short of the soffit so air can still enter
- Valleys and roof-to-wall joints where snow drifts pile up
- Chimney and pipe penetrations with layered flashing
Key Parts You Will See on Every Diagram
Every drawing shows the same core parts, though the names can vary. The roofing layers always sit in a set order, and that order matters more than the products chosen. The deck comes first, then a waterproof barrier, then the outer covering.
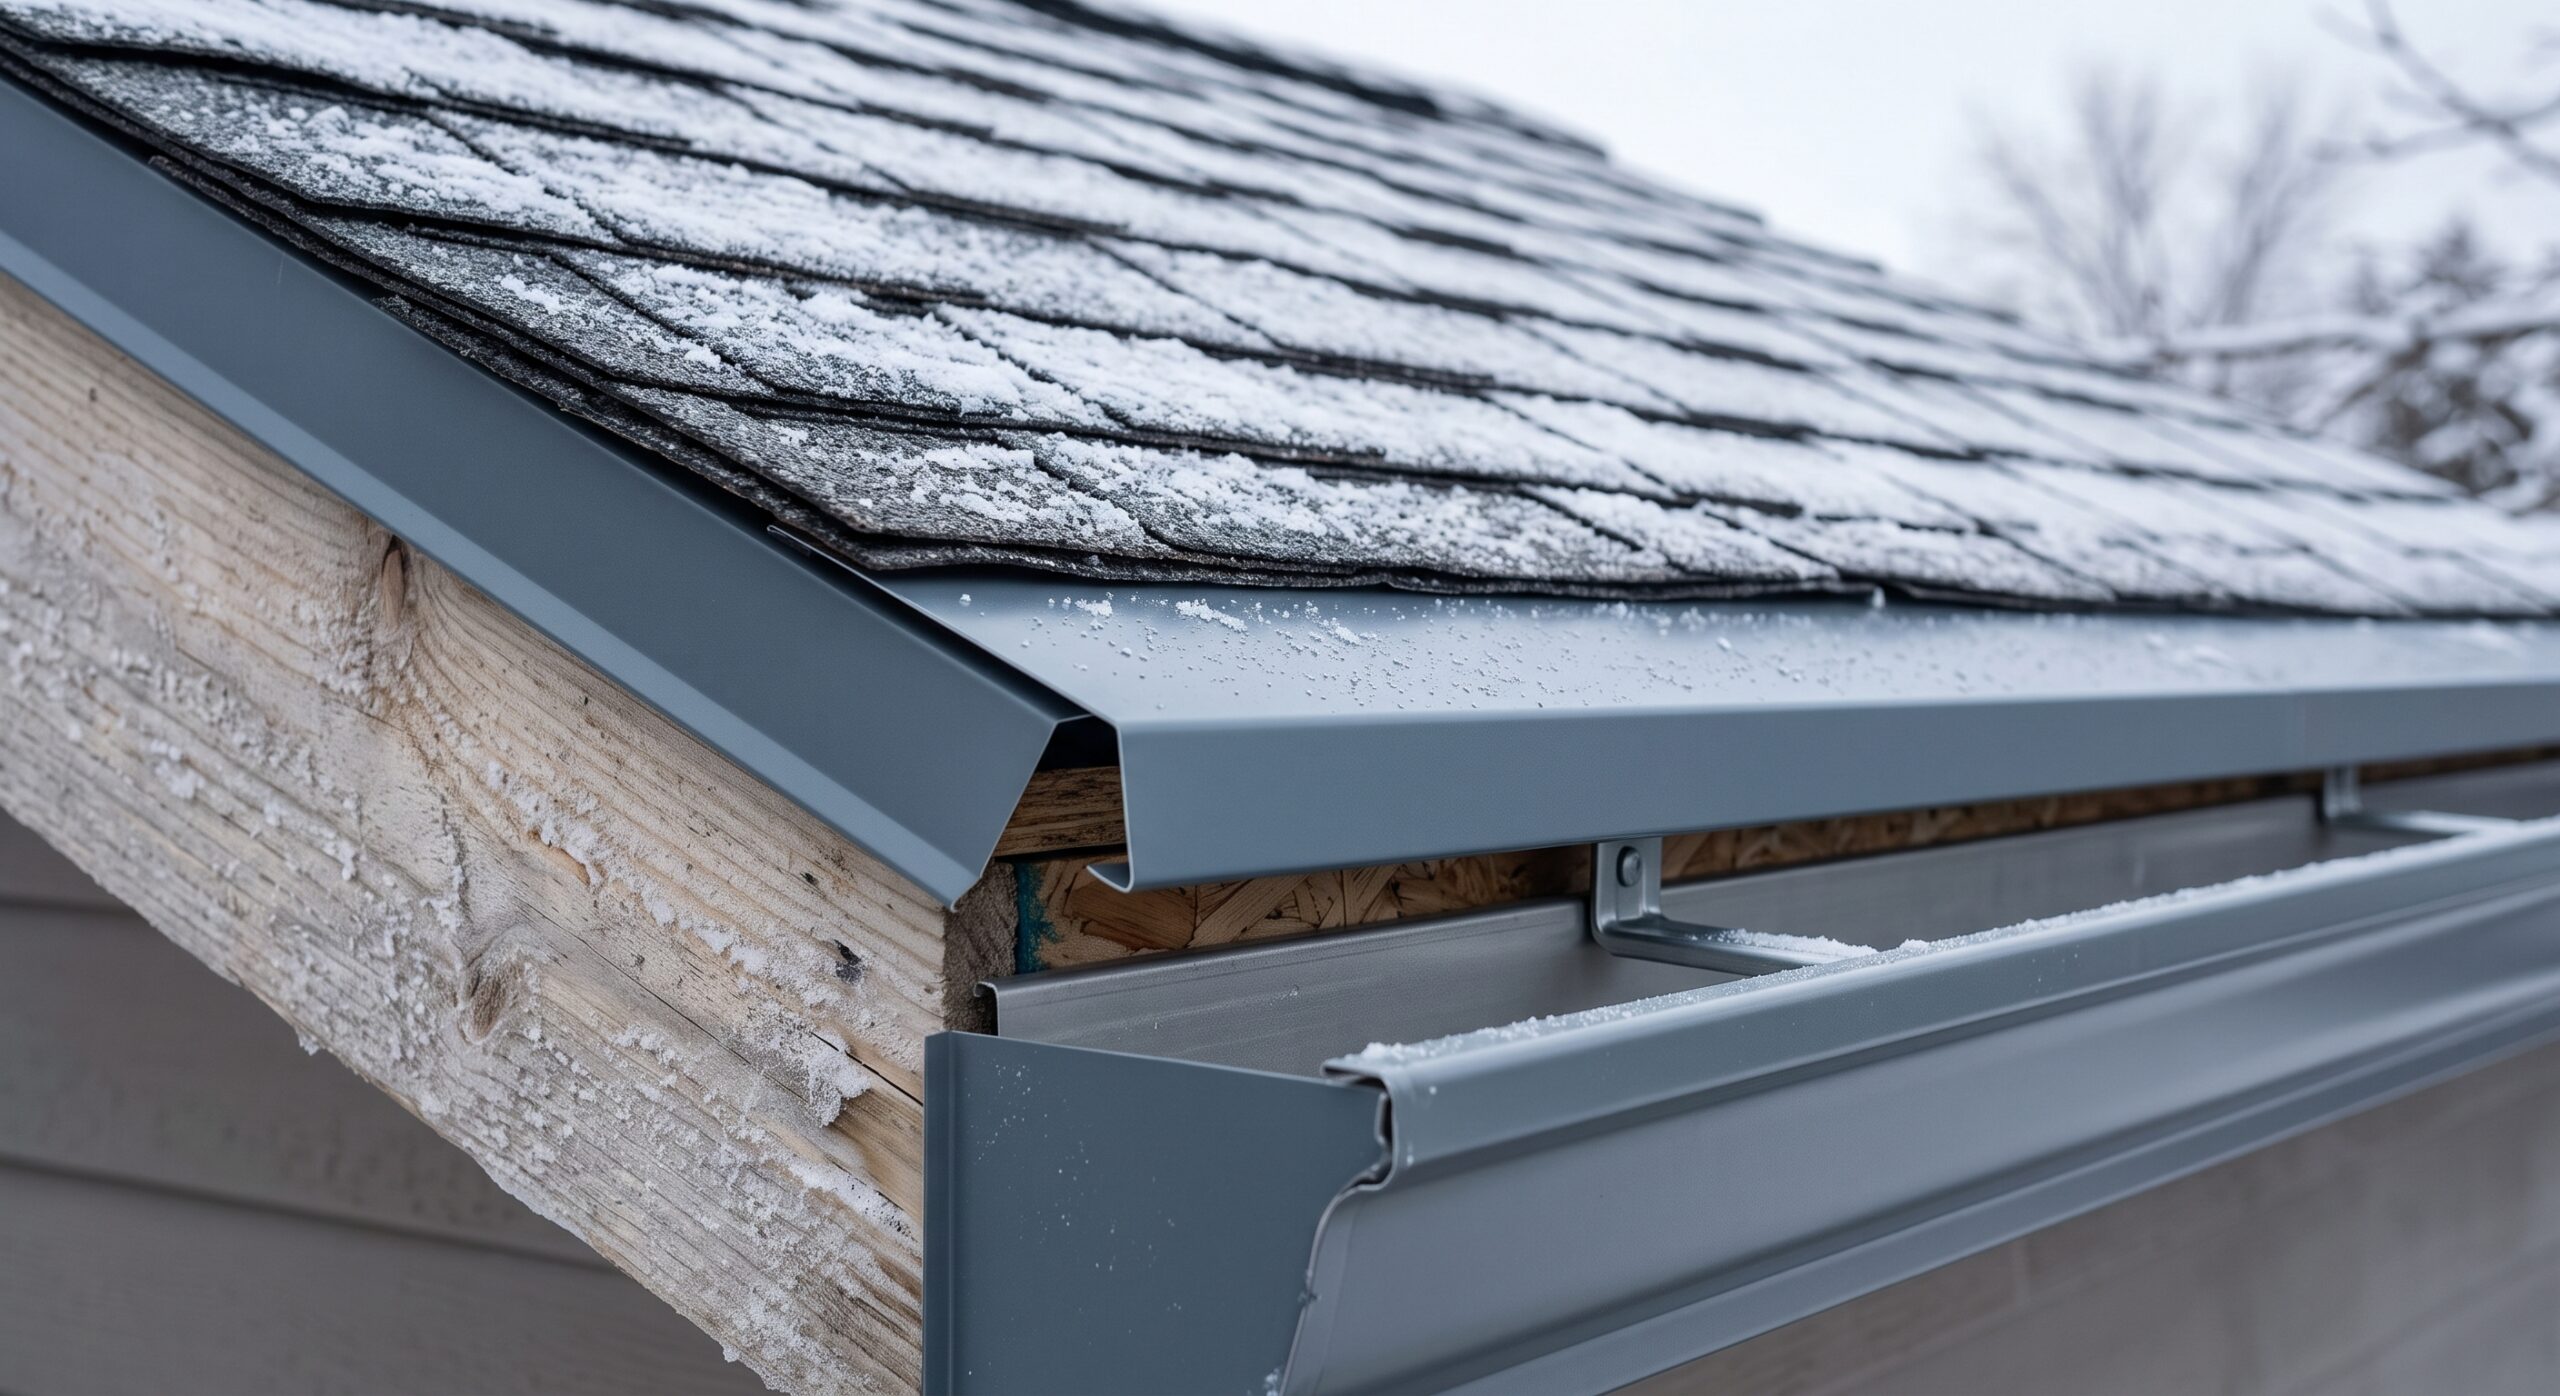
On low-slope roofs, a roof membrane replaces shingles and forms one continuous waterproof skin. Along the borders, roofing edge flashing guides water into the gutter and keeps wind-driven rain from creeping behind the fascia.
| Roof Part | Main Job | Winnipeg Watch Point |
| Deck | Carries the load and holds fasteners | Soft or stained spots after long winters |
| Ice barrier | Blocks water that slips past the covering | Ice damming along the eaves |
| Outer covering | Sheds rain and snow | Cracking from repeated freeze-thaw cycles |
| Flashing | Seals joints and edges | Gaps around chimneys and walls |
| Ventilation | Keeps attic air moving | Frost on the underside of the deck |
Ventilation deserves extra attention because it is the part people skip most often. Warm indoor air rises into the attic, and if it cannot escape, it condenses on cold wood.
Over a Manitoba winter, that moisture can soften the deck and feed mould. A good drawing shows intake and exhaust openings clearly, so you can check that both exist and that insulation is not blocking them.
Which Diagram Option Suits Your Roof Best
The right choice depends on what you are trying to do. Here is a simple way to match the drawing to the situation.
- Steep-slope house with a leak works best with a cross-section view, since it shows where water enters and travels.
- Full shingle replacement works best with an exploded layer view, because every material and step is visible for quote comparison.
- Large flat commercial roof works best with a plan view showing slopes toward drains, plus a detail drawing of the membrane seams.
- Permit or insurance paperwork works best with an elevation view alongside a plan view.
For the average Winnipeg homeowner, the best pairing is a cross-section drawing plus a simple plan view. The first explains what is inside the roof, and the second confirms the measurements and layout. Together they cover nearly every repair or replacement conversation without adding confusion.
Things To Know
- Drawings are only as good as their labels, so ask for materials and layer names to be written next to each part.
- A missing ventilation path on the drawing usually means it was left out of the plan.
- Layer order matters more than any single product, so check that barriers sit below the outer covering.
- Request the drawing in writing before signing, and keep it with your dated photos.
- Building code rules can affect insulation depth and venting, so confirm requirements before ordering materials. The Canadian Roofing Contractors Association shares industry standards that are worth reading.
- Browse a roofing gallery and compare finished roofs with your own drawing to spot differences in edge and valley work.
- Winter installs need extra care, since cold weather can slow the sealing of certain layers.
Bringing It All Together
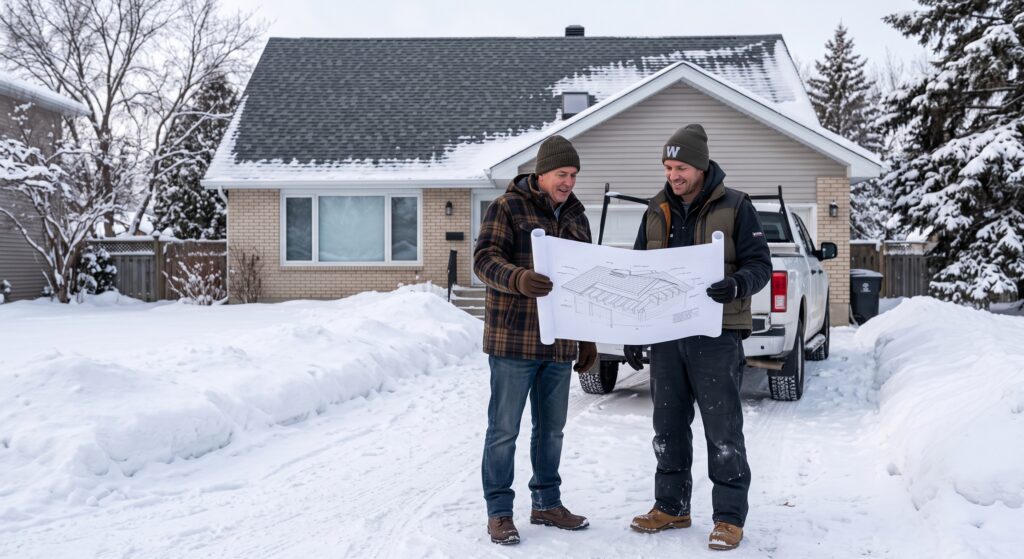
A roofing diagram gives you a clear picture of what sits above your head and why each layer exists. For most Winnipeg homes, a cross-section view paired with a simple plan view answers almost every question about repairs, replacements, and quotes.
Learn the layer order, watch the edges and vents, and keep your drawing close when the weather turns harsh.
If you have any questions about roofing or need help reading your own roofing diagram, we would love to hear from you. Zega Roofing offers free inspections and honest advice across Winnipeg and the surrounding communities. Contact us or call +1 204-997-2697 to book a visit today.
Frequently Asked Questions
Can I draw my own roofing diagram at home?
Yes, a simple sketch works well. Measure the slopes, note each layer you can see from the attic, and mark vents and flashing. A contractor can then turn it into a detailed drawing.
What is the difference between a roof plan and a cross-section?
A plan looks down from above, while a cross-section slices through the roof. The plan shows shape and measurements, and the cross-section shows the layers and airflow.
Do small repairs still need a diagram?
Not always, but it helps. A quick sketch marking the leak, the nearest flashing, and the vent path keeps the repair aimed at the real cause.
Which roof layer fails first in Winnipeg winters?
The edge details usually fail first. Eave barriers and flashing joints take the brunt of ice, meltwater, and refreezing.
How often should I compare my roof to its diagram?
Once each spring and once each fall. Check for lifted flashing, damaged vents, and new stains, then update your sketch.